
-
-
The Two Slots on the Header Projection-Mount Brackets are to Install the Top Critter Catcher Assembly.
-
In a Retrofit Application, you may not Receive the Slotted Projection Brackets. In this case, Holes will need to be Drilled in your Current Brackets to Accommodate the Top Critter Catcher Assembly.
-
In this case, You will need to Determine where the Holes need to be Drilled in order for the Brush to Contact your Existing Door Tracks, And for the Vinyl to Reach the Back of your Goff's Door Header where it Mounts.
-
-
-
Your Top Critter Catcher Assembly Kit will Include:
-
Vinyl Critter Catcher Panel
-
30mm Rail
-
If Receiving this Kit with Original Door Purchase, Vinyl Panel and Brush will be Mounted to Rail upon Receipt.
-
In Retrofit Application, the Vinyl Panel will be Mounted to Rail, but the Brush will need to be Removed from your Goff's Door Header, and Installed onto the Rail.
-
Brush Assembly
-
Hardware to Install the Assembly
-
All Hardware and Fasteners will be Mounted onto the Rail upon Receipt.
-
-
-
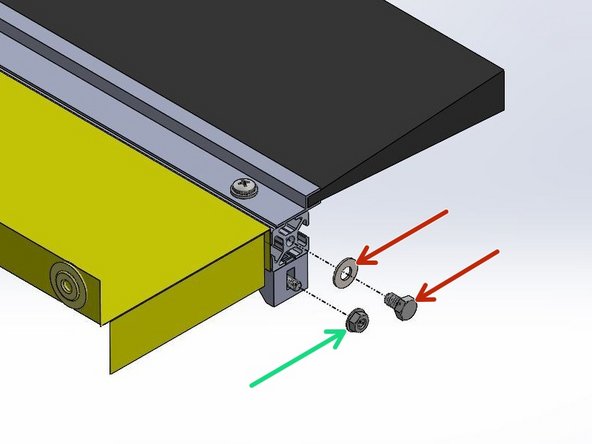
Remove the 5/16-18 Hex Bolt (with Washer) from the End of the Rail.
-
Remove the 1/4-20 Serrated Flange Nut from the Gusset.
-
-
-
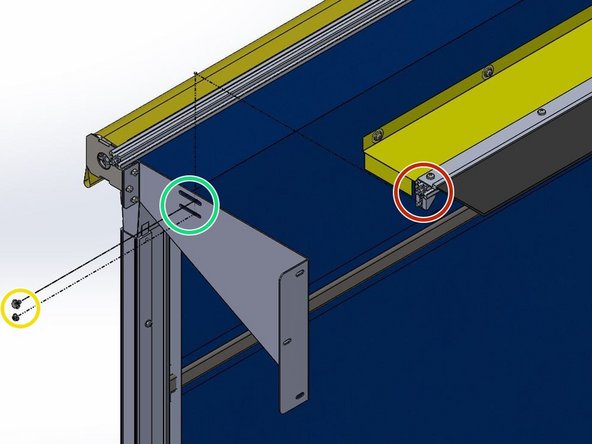
The Critter Catcher Assembly's Rail fits between the Projection Brackets.
-
The Brush will Face Away from the Goff's Door Header as Shown.
-
The Holes in the End of the Rail, and in the Gusset, Line up with the Top and Bottom Slots in the Projection Brackets, Respectively.
-
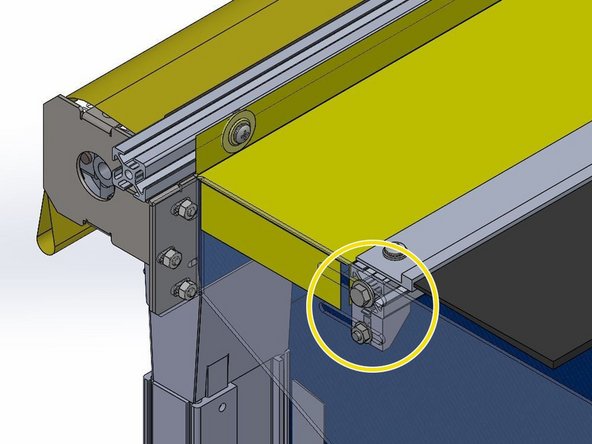
The Fasteners that were Removed in a Previous Step can then be Replaced and Tightened.
-
It is Easiest to Replace the 5/16-18 Hex Bolts in Both Ends of the Rail First to Hold the Assembly in Place, then Add the Serrated Flange Nuts after to Prevent undesired Rotation of the Assembly.
-
-
-
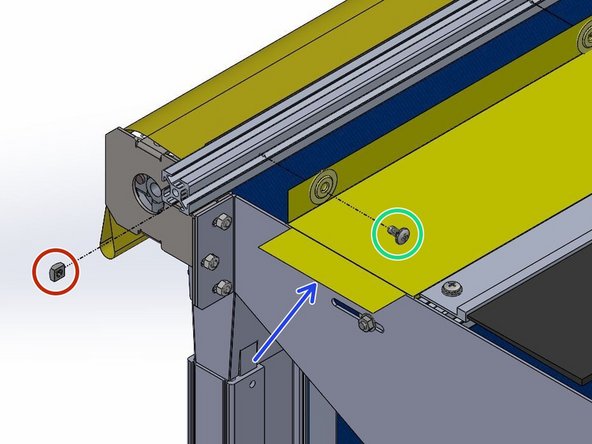
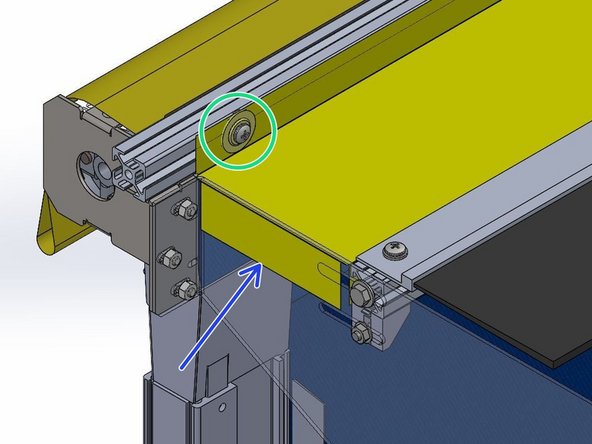
The Last Step is to Mount the Vinyl Panel, through the Grommets, to the Back of the 30mm Rail on your Goff's Door Header.
-
Slide the Square Nuts (provided) into Rear-Facing Slot on the 30mm Rail.
-
Line-up each Square Nut with it's corresponding Grommet, and Fasten the Vinyl to the Rail using the 1/4-20 Screws (provided).
-
Remove the Adhesive Backing on the Velcro Sewn onto the Underside of the Overhanging Flap.
-
Pull the Flap Taut, and Adhere the Adhesive Backing to the Outside of the Projection Bracket.
-


Team
