-
-
Line in (HOT)
-
Motor UP
-
GROUND
-
Motor DOWN
-
-
-
Motor UP
-
Line In
-
Ground
-
-
-
Motor DOWN
-
-
-
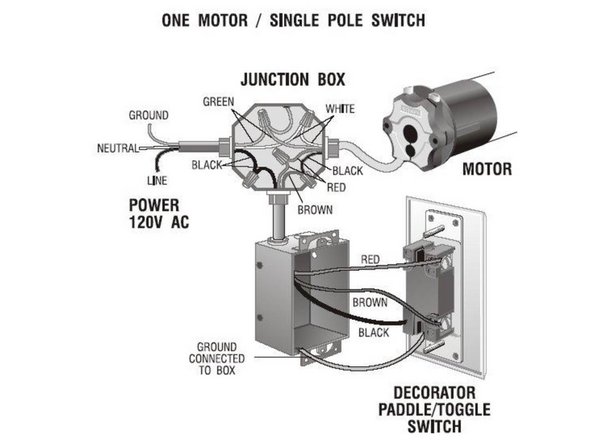
The Roll Tube Motor is controlled by a single “maintained” center-off toggle switch. Only one switch can be used per motor and wiring multiple switches in parallel or series will NOT allow for proper operation of the motor.
-
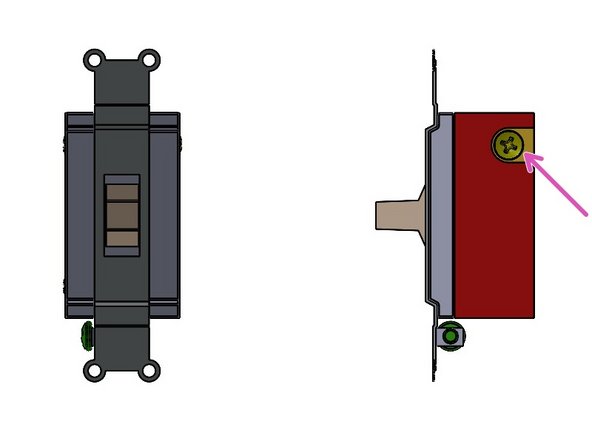
- NOTE: Your switch may not exactly represent the unit depicted in the above diagram. If not, connect the BLACK (AC Power HOT) to the BLACK screw on the switch Connect the BLACK (Motor Direction #1) to one of the brass-tone screws, and connect the RED (Motor Direction #2) to the remaining brass-tone screw.
-
- Using a chassis ground in the switch’s housing, connect it to the GREEN screw on the switch.
-
The GREEN Motor wire and the GREEN ground from your line-in terminate at the chassis of a junction box (See Figure 1).
-
- The WHITE Motor wire and the WHITE Neutral Line-In wire tie together in a wire nut.
-
-
-
After the power wiring has been installed (and power has been enabled to the unit) it will be necessary to Check/modify the direction of motor rotation. Care should be exercised during these operations to avoid damage to the assembly.
-
-
-
Swap the Red and Black Motor wires on the Toggle Switch
-
-
-
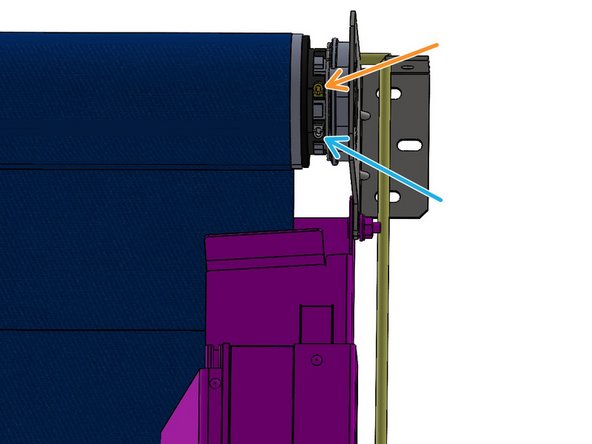
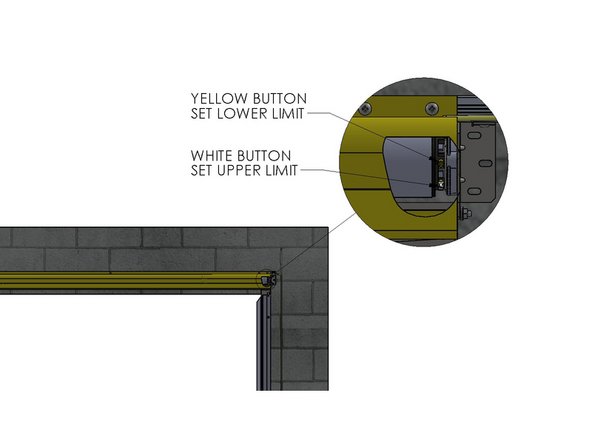
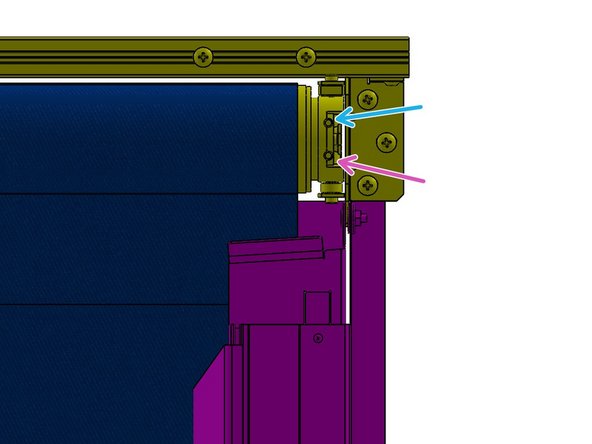
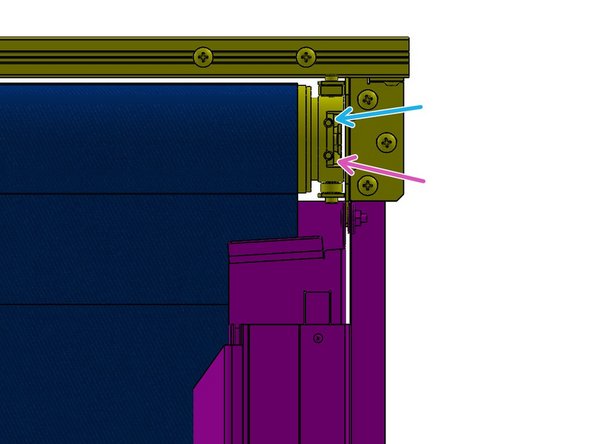
600 Series Doors have Buttons at the end of the Motor. They are used to set the OPEN and CLOSE Limits. The Top Button is the Close Limit; The Bottom Button is the Open Limit.
-
Push both buttons in. They should lock in the depressed position.
-
With the Toggle, jog the door to the open position. Press the lower button to the out position.
-
Reverse the Red and Black Motor wires if the Door is closing instead of opening.
-
With the Toggle, jog the door to the closed position. Press the top button to the out position.
-
Test limits a few times to confirm they are set properly.
-
-
-
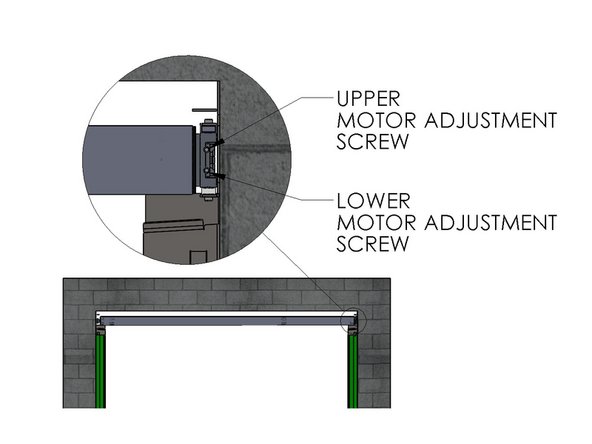
1200/1800 Series Doors have Dial Limit Switches at the end of the Motor. They are used to set the OPEN and CLOSE Limits. The Top Dial is the Close Limit; The Bottom Dial is the Open Limit
-
Clockwise Turns Add Door Travel; Counter-Clockwise Turns Remove Door Travel
-
-
-
Using the Switch, begin by Jogging the Door toward the Closed position.
-
Reverse the Red and Black Motor wires if the Door is Opening instead of Closing.
-
Stop the door about 1 to 2 feet above the desired closed position.
-
Turn the top dial (located at the end of the motor) Counter-Clockwise (CCW) to the end of the Lead Screw's travel. You should feel or hear a slight bump/click to remove travel from the close limit.
-
Flip the toggle switch down and leave it there. The door SHOULD NOT MOVE. If it does, stop it, and add more ccw turns to the top dial.
-
Once there is no movement, flip the toggle switch down, and leave it there, while adding clockwise turns to the top dial. As you turn the dial clockwise, the door will inch itself down.
-
Continue to add clockwise turns to the top dial until the door inches itself into your desired closed position.
-
-
-
To set the Open limit, jog the door up and stop it 1-2 feet shy of the desired open position. Adjust this limit in the same fashion as you did the close limit, using the lower dial on the motor.
-
-
-
Door moving in the wrong direction 1. Reverse the RED and BLACK Motor wires connected to the brass-tone screws on the toggle switch.
-
Door stuck in open position 1. Add travel to the closed limit (See ‘SETTING THE LIMITS”). 2. If 600 Series door(s), make sure limit button is pressed/depressed completely when adjusting.
-
Door stuck in closed position 1. Add travel to the open limit (See ‘SETTING THE LIMITS”). 2. If 600 Series door(s), make sure limit button is pressed/depressed completely when adjusting.
-
Almost done!
Finish Line


