
-
-
Technical Support Contacts:
-
Phone: 262-746-3374
-
Email: techsupport@goffscw.com
-
Website: http://www.goffsenterprises.com
-
-
-
If the Header Assembly is Installed in the Facility, the Door Roll Assembly will need to be held in place during the removal of the Idler Assembly.
-
Remove and retain three Flanged Nuts.
-
Remove the Idle Plate with Bearing.
-
Remove the metal Spacer.
-
Slide the Idle Shaft out of the Roll Tube.
-
-
-
Roll Tube in Header Assembly
-
Counterbalance Assembly
-
Metal Washer
-
Spring Mounting Plate
-
Flanged Nuts (3)
-
Connecting Pin with Clip
-
Alignment Tab and Grooves
-
-
-
Slide the Metal Washer onto the Shaft
-
Align the Holes of the Mounting Plate Flanges
-
with the Hole in the Tube of the Counterbalance Assembly.
-
Slide the Pin through the Holes.
-
Fasten Clip to retain the Pin.
-
-
-
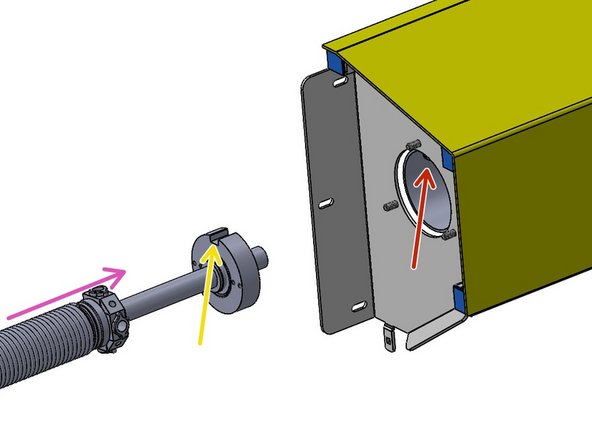
Align the Groove on the end of the Counterbalance
-
with the Tab inside of the Roll Tube.
-
Slide the Counterbalance Assembly into the Tube.
-
-
-
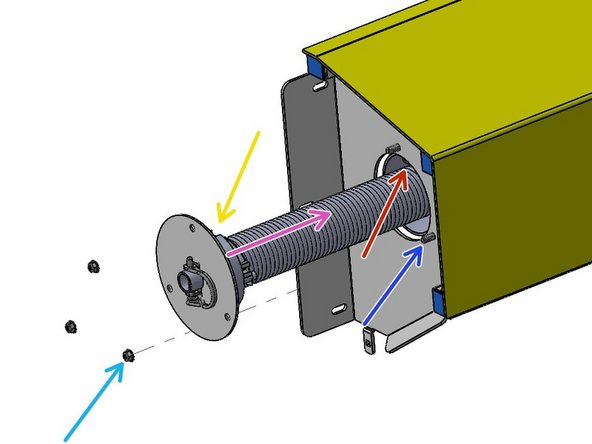
Align the second Hub Groove
-
with the Tab on the Roll Tube
-
then fully insert the Counterbalance Assembly.
-
Fasten the three Flanged nuts securely
-
to the Studs on the Header Mounting Bracket.
-


Cancel: I did not complete this guide.
One other person completed this guide.
Team
