Tools
Parts
-
-
Inside the Control, Locate the VFD in the Upper-Right Corner.
-
Confirm your VFD is an E800 Model.
-
Then Remove the Cover Plate by Loosening the Phillips Screw Shown.
-
Underneath this Cover Plate is where all of the Re-Wiring will Take Place.
-
-
-
Begin by Removing all of the Wires from the VFD.
-
There are 3 Fasteners Holding the VFD in Place.
-
1 on the Top
-
1 in Each of the Bottom Corners.
-
Remove These Fasteners Using a #2 Phillips Screwdriver.
-
-
-
Install the New Drive, Using the Fasteners Removed in the Previous Step.
-
See Previous Step for Fastener Locations.
-
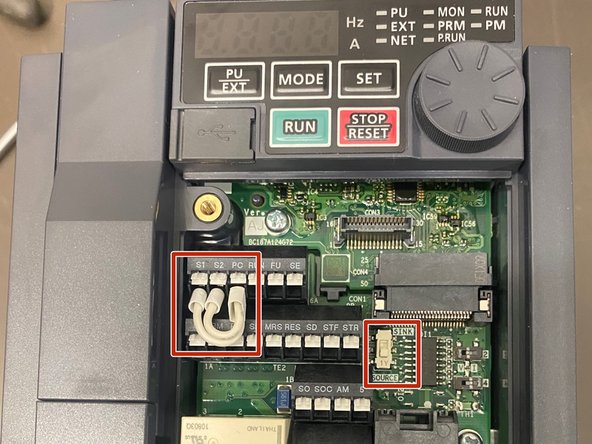
Remove the Factory Jumper Wires Between S1, S2 and PC.
-
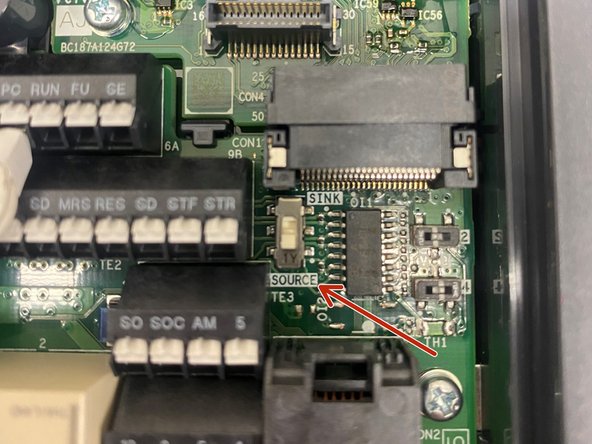
Be Sure the DIP Switch is in the SOURCE (Down) Position.
-
-
-
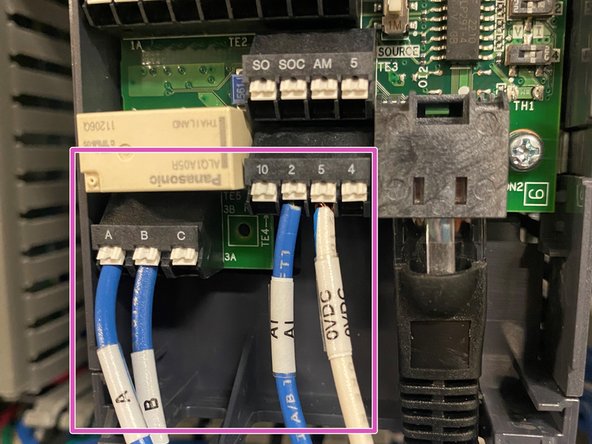
Begin with the Bottom Row:
-
Wire A to Terminal A
-
Wire B to Terminal B
-
Wire AI to Terminal 2
-
Wire 0VDC to Terminal 5
-
-
-
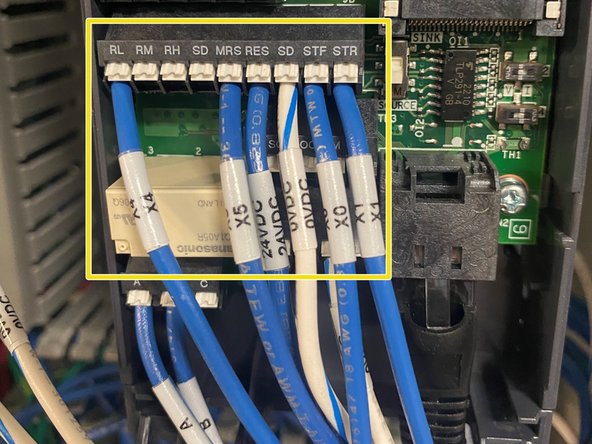
Next, Wire the Middle Row:
-
Wire X4 to Terminal RL
-
Wire X5 to Terminal MRS
-
Wire 24VDC to Terminal RES
-
Wire 0VDC to Terminal SD
-
Wire X0 to Terminal STF
-
Wire X1 to Terminal STR
-
-
-
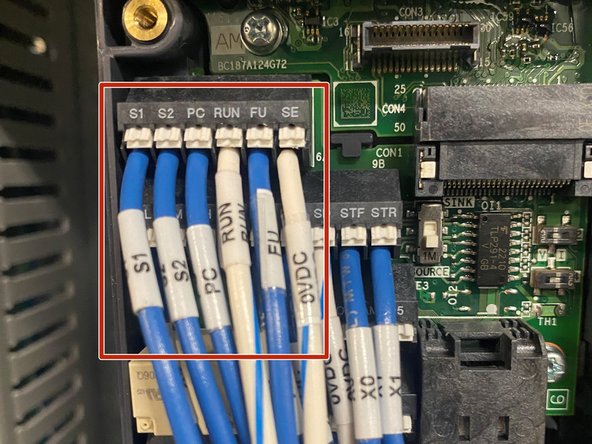
Lastly, Wire the Top Row:
-
Wire S1 to Terminal S1
-
Wire S2 to Terminal S2
-
Wire PC to Terminal PC
-
Wire RUN to Terminal RUN
-
Wire FU to Terminal FU
-
Wire 0VDC to Terminal SE
-
Cancel: I did not complete this guide.
One other person completed this guide.


