-
-
Locate Hardware bag/box and verify count – There should 1 (One) of each item for each Curtain. (Figure 1 Installation Components)
-
Wall Mounting Hardware is not Included.
-
-
-
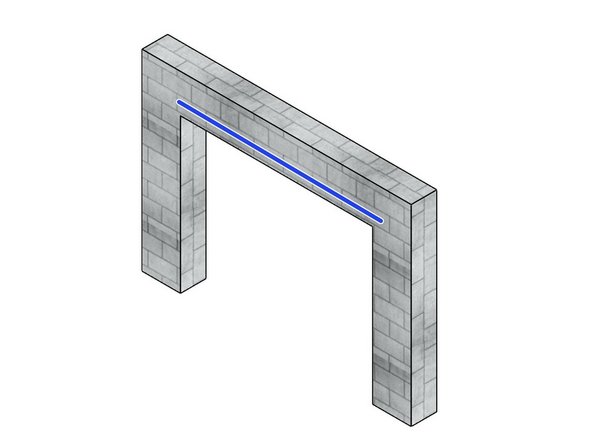
Snap a Reference/Chalk Line along the Underside, or Face, of the Mounting Surface.
-
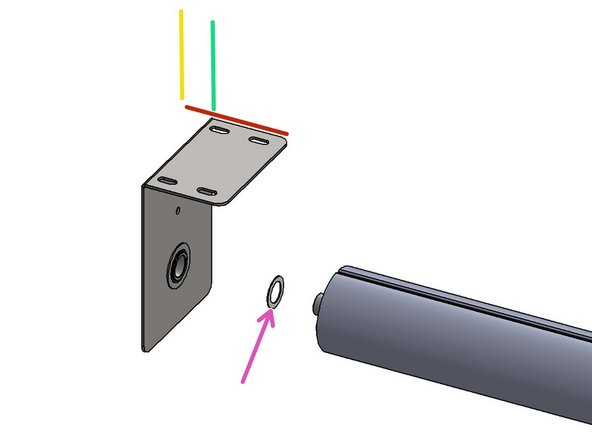
Install the Idler Bracket (Typically on the Left End).
-
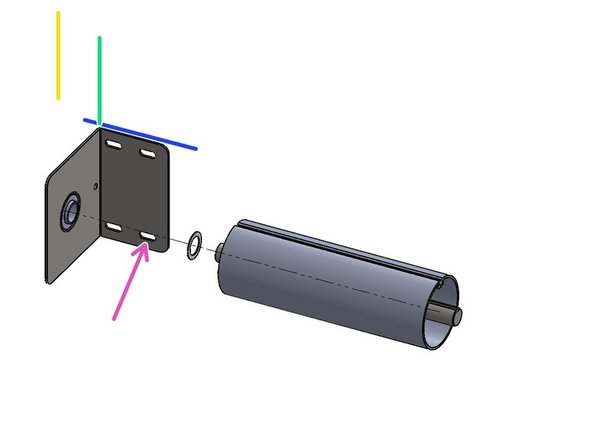
Slide a Bearing Spacer fully onto the Idle Shaft.
-
Raise the Roll Assembly, with the Bearing Spacer and Operator Mounting Bracket installed.
-
Insert the Idler shaft into the Flanged Bearing of the Idler Mounting Bracket.
-
Align the Operator Mounting Bracket’s edge to your Reference line.
-
Transfer the mounting hole locations.
-
Install the Operator Mounting Bracket to the Mounting Surface.
-
-
-
Snap a chalk line 3-1/4” from the Centerline of Roll Tube along the entire run to indicate the outer edge of the Mounting Brackets. (The Bracket Width, and Maximum Roll Diameter, are 6-1/2").
-
-
-
Determine where the Left End of the Curtain Run will be on the Mounting Surface.
-
Make a Cross Mark 3/4"-1" inboard/Curtain side. This will be the Outside Edge of the Mounting Bracket.
-
Align an Idler Mounting Bracket edge to your Reference /chalk line and to the Cross Mark at the far-left end of the run.
-
Level/Plumb the Bracket to fine tune the accuracy of the Mounting Bracket location.
-
Transfer the four Mounting Hole locations onto the Mounting Surface.
-
Level, then Mount the Idler Mounting Bracket with appropriate hardware.
-
-
-
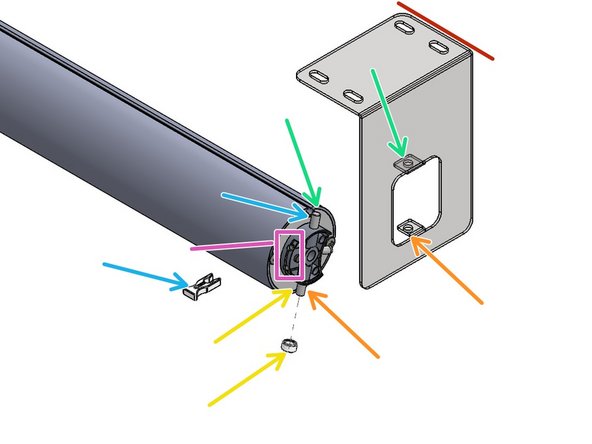
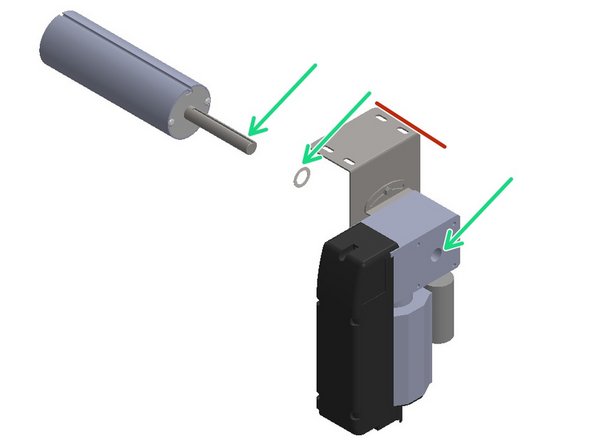
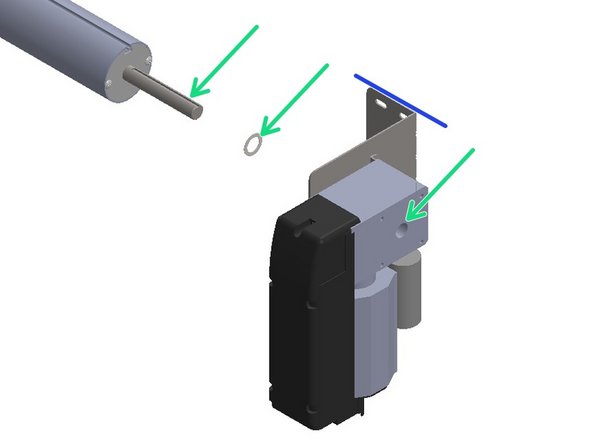
Lay the Roll tube on a flat work surface. Orient the Yellow Motor adjustment Buttons generally toward the Front or Bottom for easiest access when mounted. Orient the flange of the Motor Mounting Bracket to Top (for Ceiling Mount) or Back (for Wall Mounting).
-
Insert the Upper Motor Peg fully into upper hole of the Motor Mounting Bracket.
-
Slip the plastic Ring onto Lower Motor Peg.
-
Insert the Lower Motor Peg into the lower hole on the Header Mounting Bracket.
-
Insert the plastic Clip onto the Upper Motor Peg to fill space between the Bracket and Motor.
-
To Install, insert the Idle shaft (with Bearing spacer) into the mounted Idle Mounting Bracket.
-
For Wall Mount - Level the Curtain Roll. Then Install the Curtain Roll with the Mounting Bracket.
-
For Ceiling Mount – Align to your chalk line. Then Install the Curtain Roll with the Mounting Bracket.
-
-
-
The Factory Pre-Assembles the Motor to the Mounting Bracket.
-
Slide a Bearing Spacer onto the Drive Shaft, then the Motor (with Dive Mounting Bracket) and Shaft Key, fully onto the Drive Shaft.
-
Insert the Idle shaft (with Bearing spacer) into the mounted Idle Mounting Bracket.
-
For Wall Mount - Level the Curtain Roll. Then Install the Curtain Roll with the Mounting Bracket.
-
For Ceiling Mount – Align to your chalk line. Then Install the Curtain Roll with the Mounting Bracket.
-
-
-
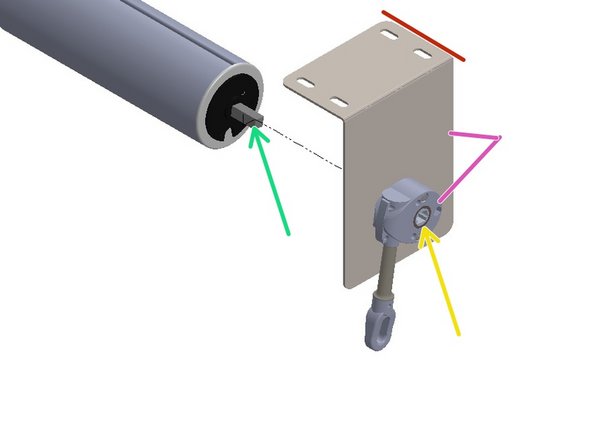
The Factory Pre-assembles the Hand Crank Operator to the Mounting Bracket.
-
Slide the Hand Crank Assembly onto
-
the Square Shaft on the Drive side of the Roll Tube.
-
Insert the Idle shaft (with Bearing spacer) into the mounted Idle Mounting Bracket.
-
For Wall Mount - Level the Curtain Roll. Then Install the Curtain Roll with the Mounting Bracket.
-
For Ceiling Mount – Align to your chalk line. Then Install the Curtain Roll with the Mounting Bracket.
-
-
-
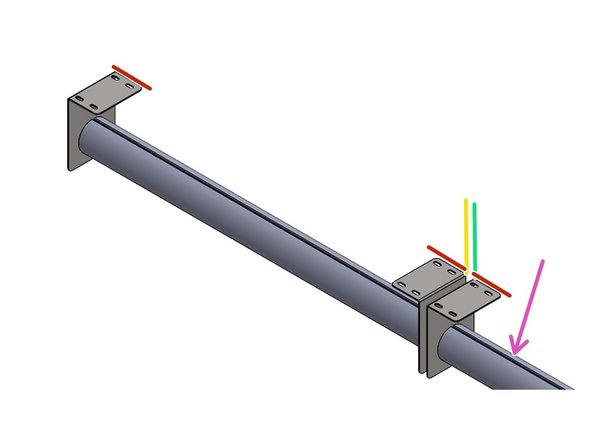
To mount another Curtain next to an Installed Curtain:
-
From the outer surface of the Installed Mounting Bracket
-
Measure and Mark at 1" to indicate the outside Edge of the next Mounting Bracket.
-
For Wall Mount - Level the Curtain Roll. Then Install the Curtain Roll with the Mounting Bracket.
-
For Ceiling Mount – Align to your chalk line. Then Install the Curtain Roll with the Mounting Bracket.
-
-
-
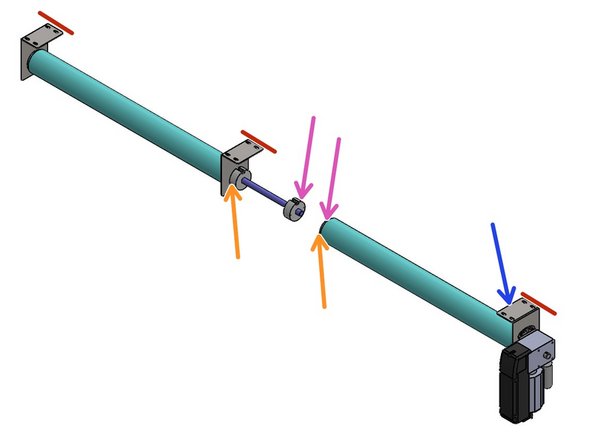
The Idler Bracket should be installed before beginning this Step.
-
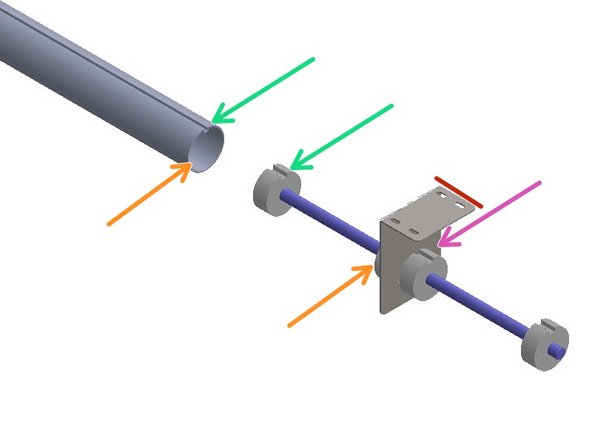
Locate the Coupler Shaft Assembly.
-
Align the Hub notch with the Tab of the first Curtain Roll,
-
then slide the shaft in until it hits the Stop Screws on the second Hub.
-
For Wall Mount - Level the Curtain Roll. Then Install the Curtain Roll with the Mounting Bracket.
-
For Ceiling Mount – Align to your chalk line. Then Install the Curtain Roll with the Mounting Bracket.
-
-
-
At this point the 1st Roll with the Long-Shaft are Installed.
-
Align the Hub notch with the Tab of the Second Curtain Roll,
-
then slide the Second Roll onto the Long Shaft until it hits the Stop Screws on the second Hub.
-
For Wall Mount - Level the Curtain Roll. Then Install the Curtain Roll with the Mounting Bracket.
-
For Ceiling Mount – Align to your chalk line. Then Install the Curtain Roll with the Mounting Bracket.
-
-
-
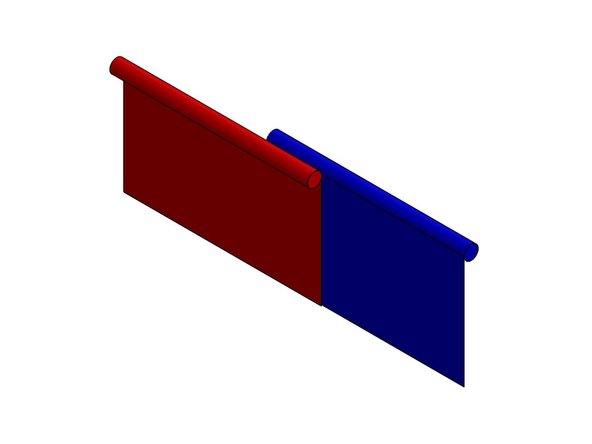
Waterfall Arrangement
-
Almost done!
Finish Line


