Tools
No tools specified.
Parts
-
-
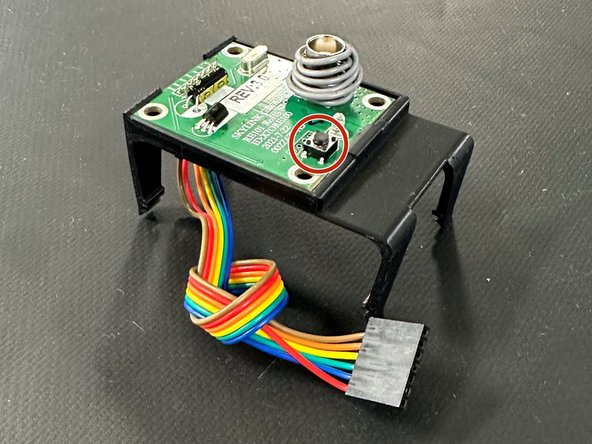
The RF Receiver Assembly Includes:
-
RF Receiver Board
-
RF Receiver Mount
-
Dupont Cable (Female - Female)
-
THIS RECEIVER WIRES INTO BOTH SMC AND TFT CONTROLLERS IDENTICALLY.
-
SMC Controller shown in this Manual.
-
-
-
Connect the Free-end of the Cable to the 6 Male Pins on the Controller.
-
Orient the Empty Slot of the Connector to Hang off the Right side of the 6 Male Pins on the Controller.
-
NOTE THAT THIS WILL RESULT IN ONE-HALF TWIST IN THE CABLE FROM THE RECEIVER.
-
NOTE THE ORIENTATION OF THE CONTROLLER IN THE IMAGES (TERMINAL BLOCK TO THE TOP)!
-
Tuck the Cable between the Receiver Mount and the Controller so that it is Neatly Hidden/Protected.
-
-
-
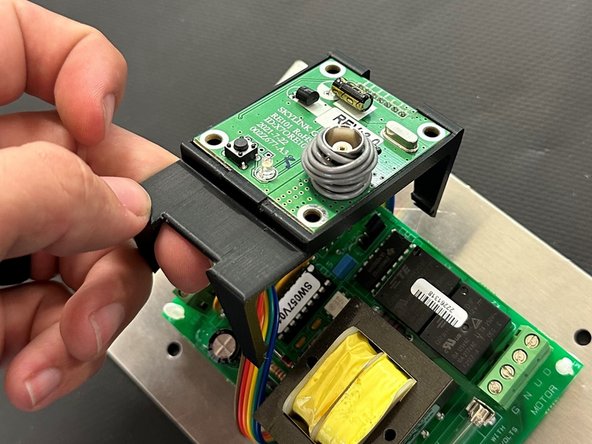
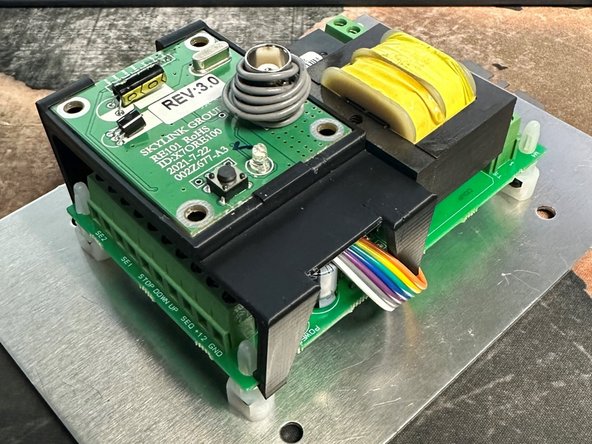
Now that the RF Receiver is Wired to the Controller, it is time to Install the Assembly onto the SMC/TFT Controller.
-
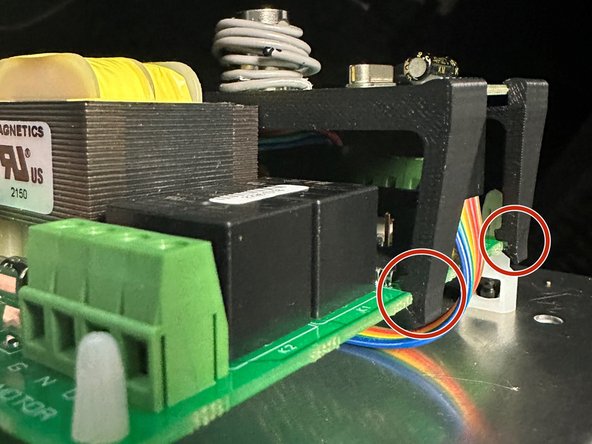
There are Slots in the (4) Feet of the Receiver Mount that Grip on the Sides of the Controller PCB.
-
Make sure all (4) Feet Mount Securely to the PCB.
-
There is some Elasticity / Spring Force in the Receiver Mount, It will bend a little in order to Mount and Secure itself to the Controller.
-
-
-
When the Controller is Powered-up, a White LED will Illuminate. If this LED is not lit, Revisit the Orientation of the Connector onto the Controller (Step 2).
-
To Program a Wireless Remote(s), Press the Button on the Top of the RF Receiver.
-
The White LED should acknowledge the Button being pressed.
-
Then Press the Button on the RF Remote you wish to Sync to this Receiver.
-
Wait a moment, then give the Button a Second Press.
-
The Door should begin Operating.
-
Each Press of the RF Remotes' Button will flow continuously through the following sequence:
-
OPEN, STOP, CLOSE, STOP, Etc.
-


