
-
-
Allow the Curtains to warm to room temperature (50 Deg. F) before unfolding them.
-
Premium Clean Curtain Track System is corrosion resistant partitioning divider designed for wash-down and low contamination areas. It is manufactured from stainless steel, Delrin, and other materials exhibiting anti-microbial and anti-oxidation characteristics.
-
The Track System is modular and sectional in design. Pieces telescope together using stub splices that are sealed with BioSeal RTV Silicone to eliminate entrapment and contamination crevices and gaps.
-
Track sections and components cannot be cut or adjusted in the field.
-
Appropriate Installation Hardware, straps, threaded rods, clamps, turnbuckles, etc. will be supplied by the Installer.
-
To reduce sway and deflection of large, elaborate systems, crisscross/angled drop supports will be required.
-
The Installer is responsible for using best practices to install the Track system in the Facility.
-
-
-
Your kit will have all of the necessary Assembly Hardware, components, and a Track Layout Drawing for a complete Track and Curtain Assembly.
-
Unpack your systems carefully, and notify the factory if there are any shortages, or if any items have been damaged during transit.
-
Track systems are more easily assembled on the floor, and then raised in smaller sections for installation.
-
Apply a bead of BioSeal RTV Silicone (included) all the way around each telescoping joint before joining a wall Mount Bracket, Bridge Bracket, or Hanger Bracket, with the provided 1/4” hardware.
-
The RTV is a sealant which provides a hermetic seal, but it does not provide any form of structure, mechanical rigidity, or bonding.
-
Lay the Track and Connectors in sequential order on the floor below the Installation Location.
-
-
-
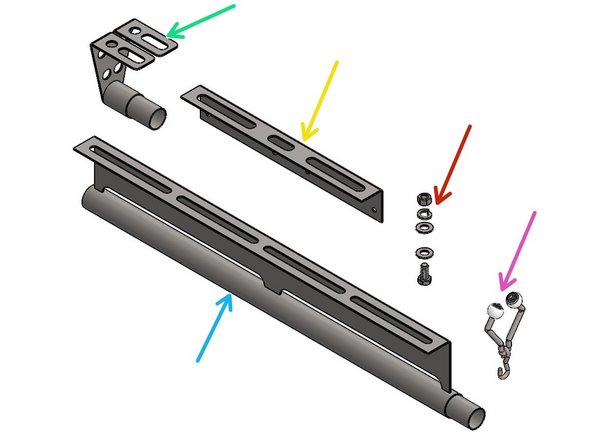
End Stop Bracket, Universal - Universal End Stops retain the Trollies on the Track.
-
Bridge Hanger Bracket -Hanger Brackets are used to secure Track Joints and to bridge Gaps.
-
Hardware Set - A Hex Bolt and Flat Washer sandwich two Brackets, and are secured with a Flat Washer, Lock Washer, and Nut.
-
Trolley - Before assembling the final End Stop Bracket, slide the Trolley Assemblies onto the Track.
-
Track, Straight - Cannot be Field Cut
-
Two Sets of Hardware are included for each Joint Connection. One Set of Hardware is included for End Stop Brackets.
-
-
-
For Specific Connection instructions, see Steps following this Step.
-
Apply a bead of BioSeal RTV Silicone around each telescoping joint before assembling.
-
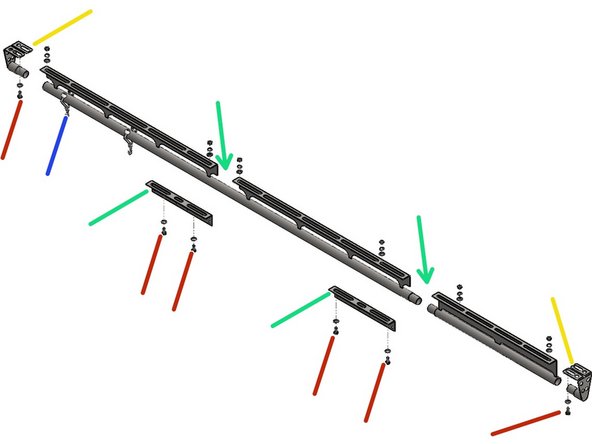
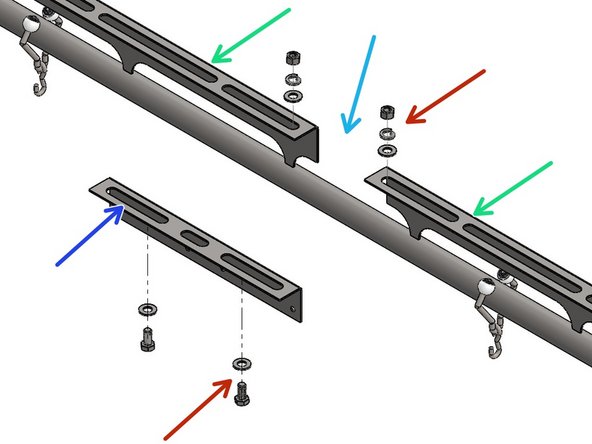
Prepare the Track Sections by installing a Bridge Bracket with two sets of 1/4" Hardware at the breaks in the welded Track Brackets, .
-
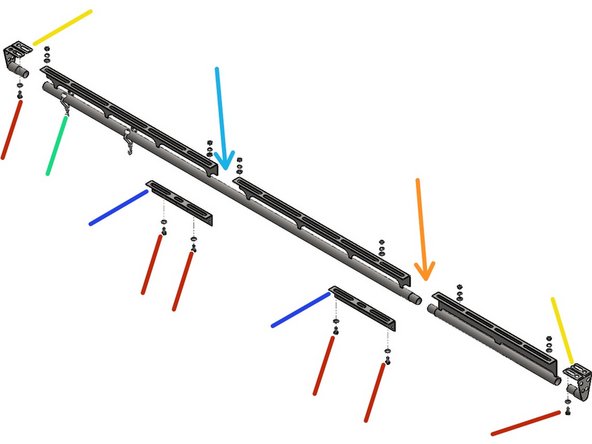
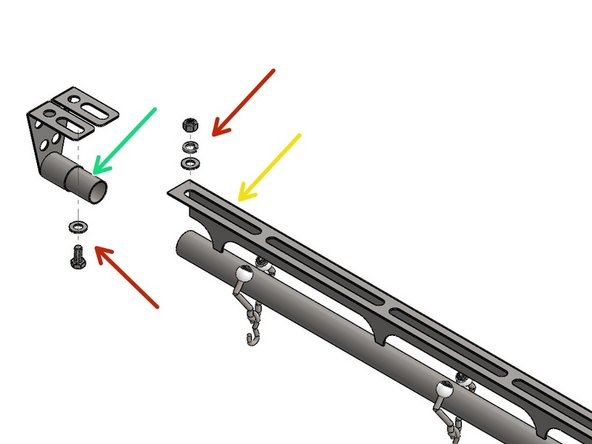
At one End of the Run, install RTV, an End Wall Mount Bracket and the First section of Track.
-
Install a set of 1/4" Hardware to secure the two parts.
-
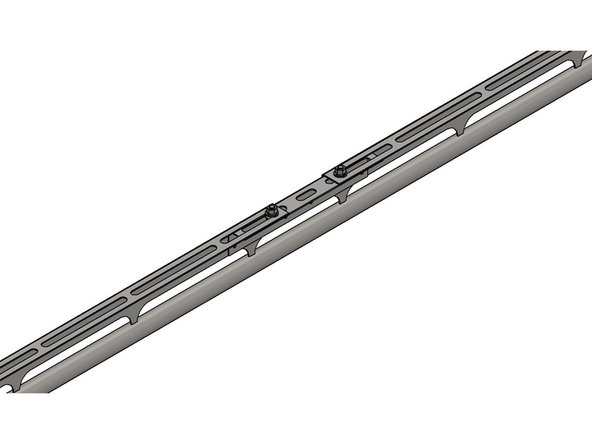
Continue adding Track Sections, RTV, Bridge Brackets and two sets of 1/4" Hardware at each Track Joint.
-
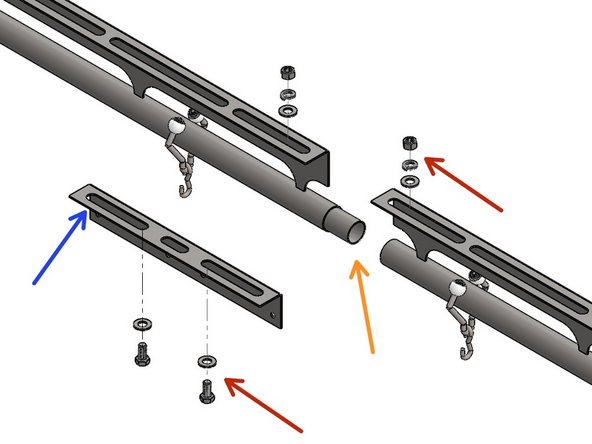
At the last Section of Track, assemble RTV, an End Wall Mount Bracket and 1/4" Hardware.
-
Assemble this to the End of the Run.
-
-
-
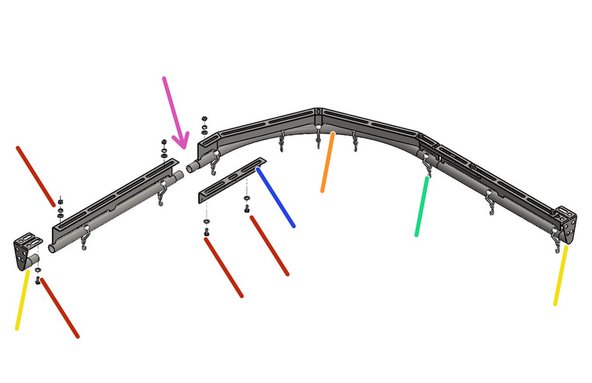
90 Degree Curved Track Sections require 24" in each direction. Straight Track Runs will be shortened by 24" to compensate for a 90 Degree Curved Track Section.
-
Follow Instructions for the Straight Track Sections.
-
Straight Track cannot be Field Cut.
-
Insert the end of the Track into the end of the Curve Track.
-
Install a Hanger Bracket with 1/4" Hardware.
-
Level and Mount the Curve Track.
-
Apply RTV, then Insert the next Section of Straight Track into the other end of the Curved Track, and secure it with 1/4" Hardware.
-
Continue to follow the Straight Track Instructions (above).
-
-
-
Apply a bead of BioSeal RTV Silicone around each telescoping joint before assembling.
-
Insert the Male Coupling of the End Stop into
-
the Female end of a Straight Track Section.
-
Fasten the Brackets through the Welded Track Brackets with one Set of Hardware.
-
-
-
Brackets are welded to to Track Sections.
-
The Gaps between the welded Brackets need to be linked with Bridge Brackets.
-
Use two Sets of Hardware to attach a
-
Bridge Bracket at each Mid-Track Gap.
-
-
-
Apply a bead of BioSeal RTV Silicone around each telescoping joint before assembling.
-
Bridge Connectors are used to secure two lengths of Track together.
-
Use two Sets of Hardware to attach Bridge Bracket at each Track Joint.
-
-
-
When the Curtains have reached room temperature (50 Deg. F), unfold them on a clean surface.
-
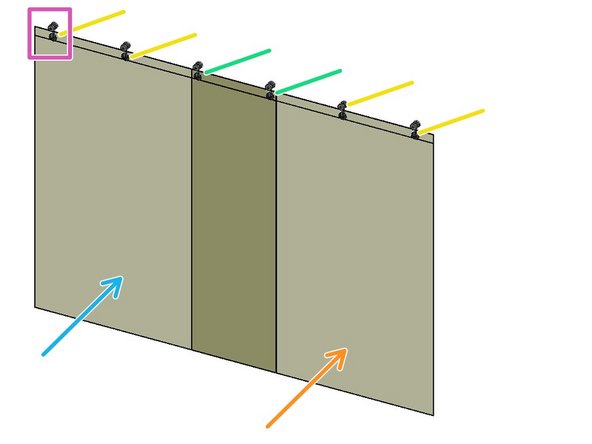
Begin at one end inserting the grommets onto the hooks.
-
A single Curtain, and single layered sections, will use one Trolley for each Grommet.
-
For a Single Curtain arrangement, crimp the Trolley Hooks closed after the Grommets are installed on the Hooks.
-
For a Multiple Curtain arrangement, Crimp all But the Last 2 Roller Hooks of the 1st Curtain.
-
The 2nd Curtain (and consecutive Curtains) will share the last two Trollies of the 1st/Previous Curtain.
-
Continue Hooking, overlapping and Crimping the Trollies until the Curtain Run is complete.
-


Team
