-
-
(2) Miller Edge Light Curtains
-
The Light Curtains will each come with (2) Black, Metal Adapter Brackets to Adapt the Light Curtains onto the G2 Light Curtain Track Mounting Brackets.
-
There is a Designated Transmitter marked "TX".
-
There is a Designated Receiver marked "RX".
-
(4) G2 Light Curtain Track Mounting Brackets
-
(8) Self-Tapping Machine Screws
-
(4) 3mm-0.50 x 10mm Machine Screws
-
(4) M3-0.50 Nylon Insert Lock Nuts
-
-
-
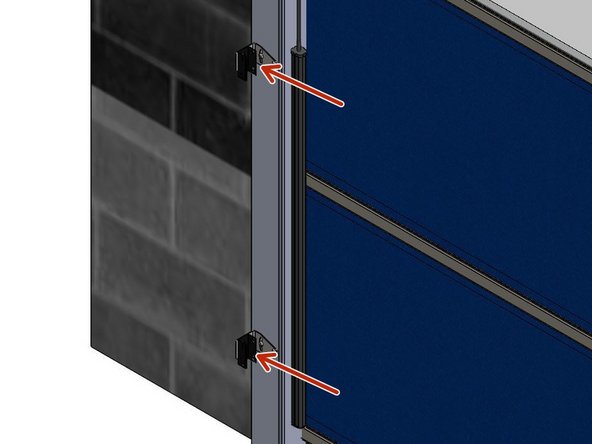
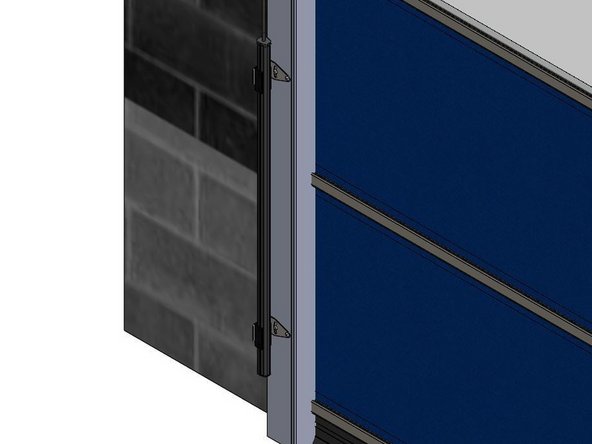
Mount the Light Curtain Track Mounting Brackets onto the Door Tracks First, Then Mount the Black, Metal Light Curtain Adapter Brackets onto the Light Curtain Track Mounting Brackets.
-
Mark the Desired Height of the Light Curtains, Making Sure they will be at the Same Height on the Left and Right Sides of the Opening.
-
Transfer the Mounting Hole Locations onto the Vertical Tracks.
-
Pre-Drill Pilot Holes for the 1/4in Self-Tapping Fasteners.
-
A 7/32in Pilot Hole works well.
-
Secure the Brackets to the Vertical Tracks using the Provided 1/4in Self-Tapping Fasteners.
-
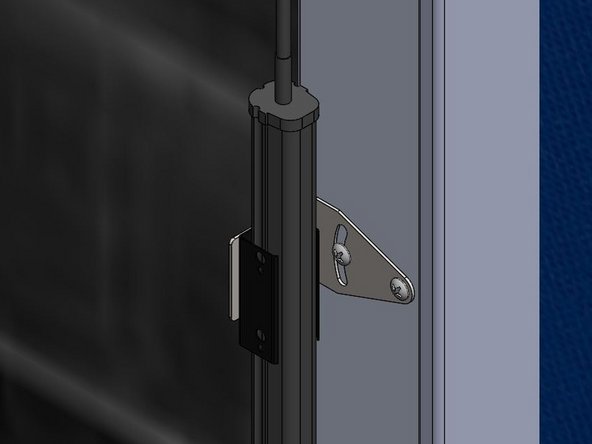
Install the Black, Metal Light Curtain Adapter Brackets onto the Light Curtain Track Mounting Brackets using the 3mm Machine Screw and the M3 Nylon Insert Lock Nuts.
-
-
-
The Light Curtains Snap into the Adapter Brackets, and are Retained with an Interference Fit.
-
If the Light Curtains are Sliding/Falling Down in the Adapter Brackets, Simply Bend the Mouth of the Adapter Brackets so that they are more Closed, and Provide a Tighter Grip on the Light Curtains.
-
Make Sure that the Sensing Sides of the Light Curtains are Facing Each-Other.
-
-
-
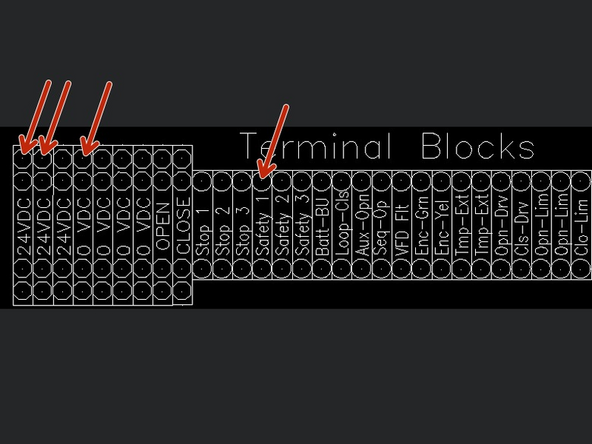
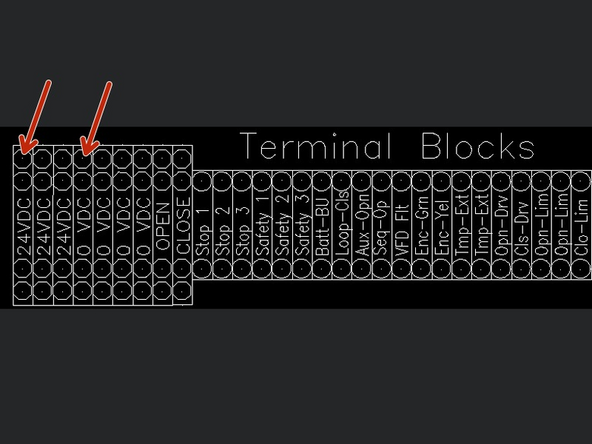
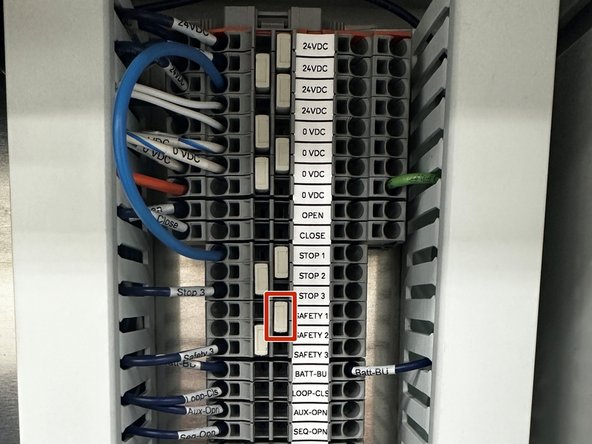
Inside of the Control Panel (on the Main Terminal Block) you will find 2 Factory Jumpers Wires.
-
Remove the Factory Jumper that is between Terminals 24VDC and SAFETY1.
-
With Multiple Safety Devices, they will have to be Wired into the Control Panel in Series.
-
See Step 7.
-
-
-
The Receiver will be Marked "RX".
-
Receiver Wiring:
-
Red Wire - 24VDC
-
Black Wire - 0VDC
-
Orange Wire - SAFETY 1
-
Brown Wire - 24VDC
-
Yellow Wire - NOT USED
-
-
-
The Transmitter will be Marked "TX".
-
Transmitter Wiring:
-
Red Wire - 24VDC
-
Black Wire - 0VDDC
-
-
-
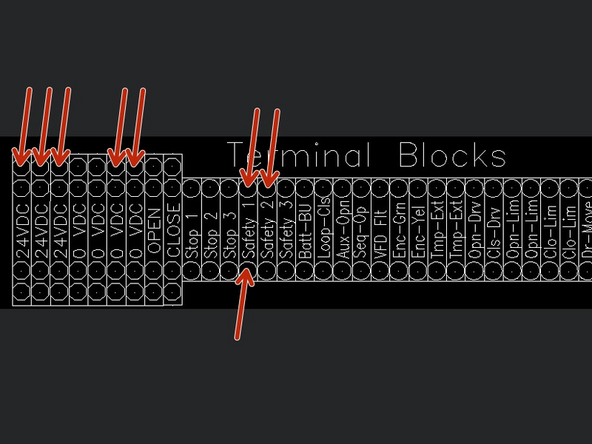
REMOVE FACTORY JUMPER WIRE BETWEEN 24VDC AND SAFETY1 + REMOVE THE GRAY TERMINAL BLOCK JUMPER BAR BETWEEN SAFETY 1 AND SAFETY 2
-
(2) Red Wires - 24VDC
-
(2) Black Wires - 0VDC
-
Brown from Light Curtain #1 - 24VDC
-
Orange from Light Curtain #1 - SAFETY 1
-
Brown from Light Curtain #2 - SAFETY 1
-
Orange from Light Curtain #2 - SAFETY 2
-
Almost done!
Finish Line


