
Tools
Parts
Featured Document
-
-
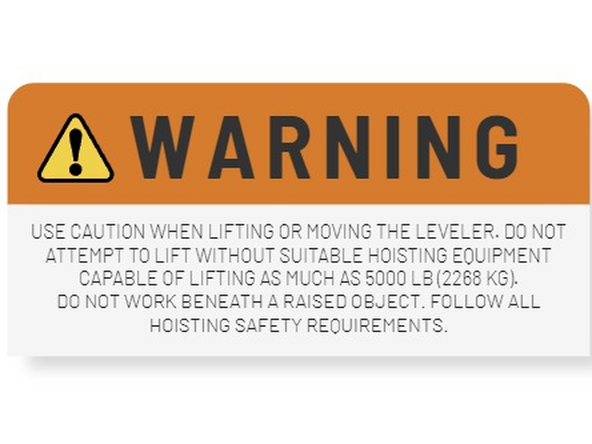
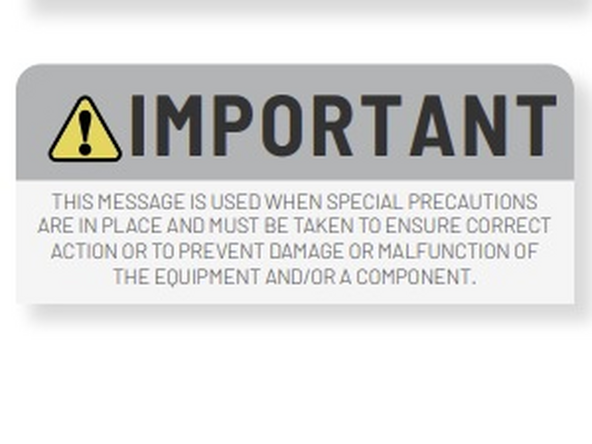
Throughout this manual, you will find colour-coded safety messages designed to clarify instructions and indicate areas of potential hazard. To prevent any possibility of equipment damage, serious injury or even fatality, it is essential that you strictly follow the directions and warnings provided in these messages.
-
Should warning labels become damaged or missing, replace them immediately. Prevent incidents by anticipating dangerous procedures or situations before they occur
-
-
-
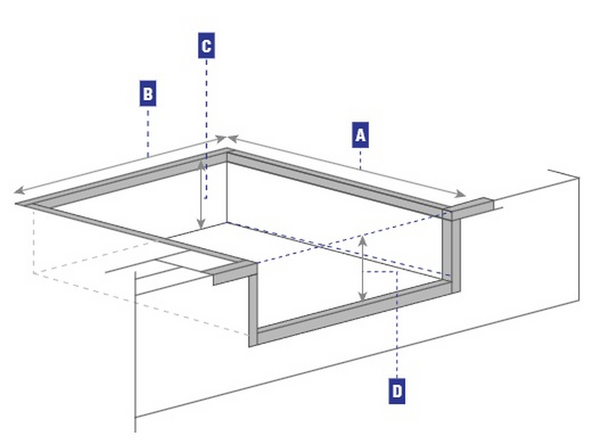
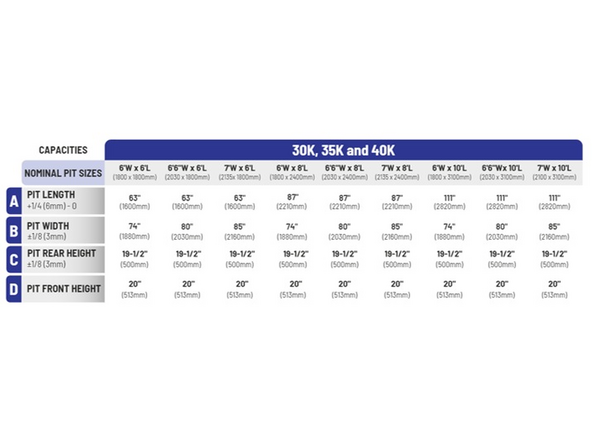
Always use architectural plans when they are available. Check the dimensions of the pit area, to make sure that the required space is available.
-
All levelers must be installed in concrete with a resistance of 250 kg/cm2, and a minimum thickness of 15cm (6”).
-
If the concrete installed does not comply with this specification, inform the personnel in charge and do not proceed with the installation of the leveler.
-
Visually inspect the pit area for cracks or defects in the Concrete.
-
If any defects in the concrete are found, inform the supervisor or personnel in charge of the finding and do not proceed with the installation until the necessary repairs have been made.
-
-
-
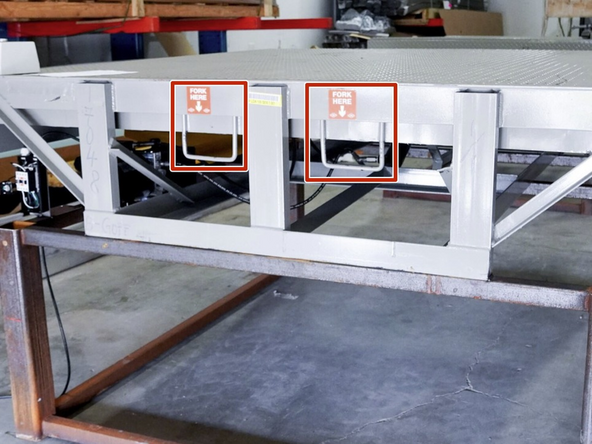
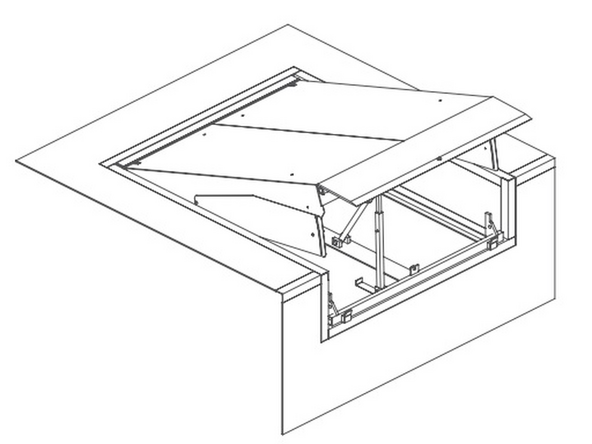
Dock levelers come equipped with fork pockets located at the rear of the unit for safe and convenient handling.
-
To ensure that the dock leveler does not experience any unnecessary damage, always lift from the rear fork pockets when using a forklift
-
-
-
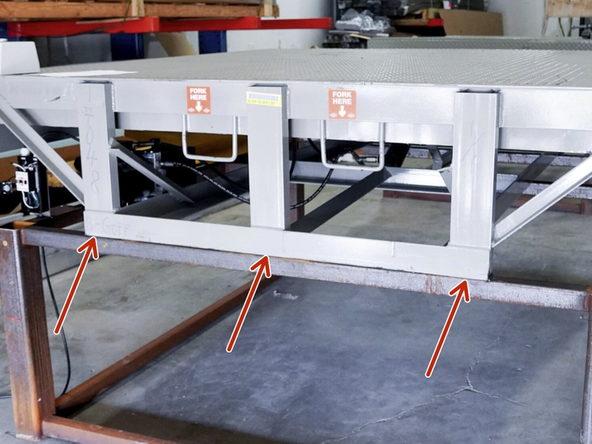
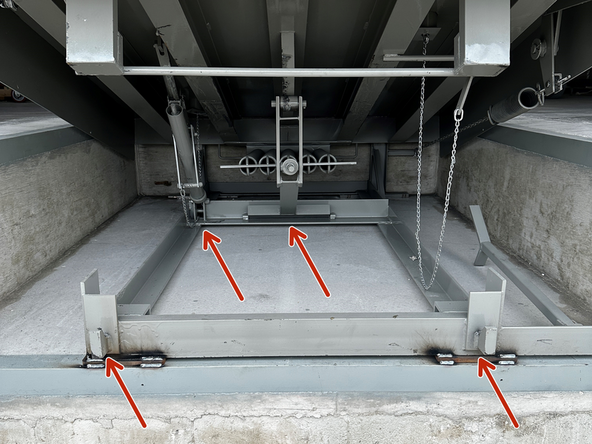
When shimming the leveler to the proper height (deck sitting flush with the pit's steel frame), shims must be added directly underneath ALL vertical support structures, and wherever force is transferred vertically through the frame.
-
In most cases, this will be between 5 and 7 shims.
-
-
-
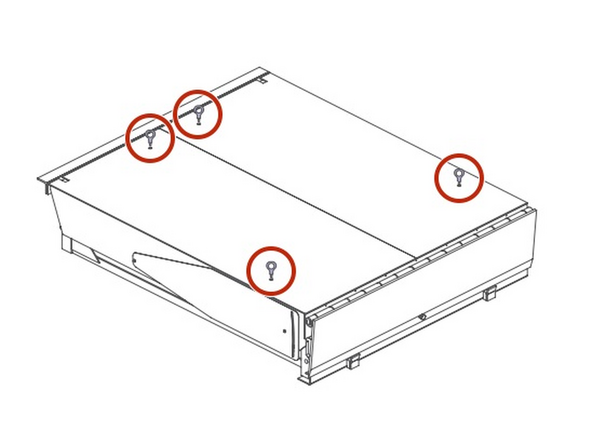
Screw the included eyebolts into the deck.
-
Some levelers only have 2 eyebolt lifting lugs.
-
-
-
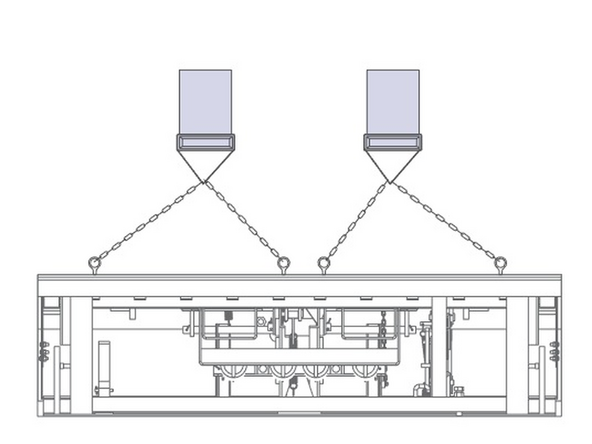
Secure slings or chains to the eyebolts.
-
Some levelers only have 2 eyebolt lifting lugs.
-
-
-
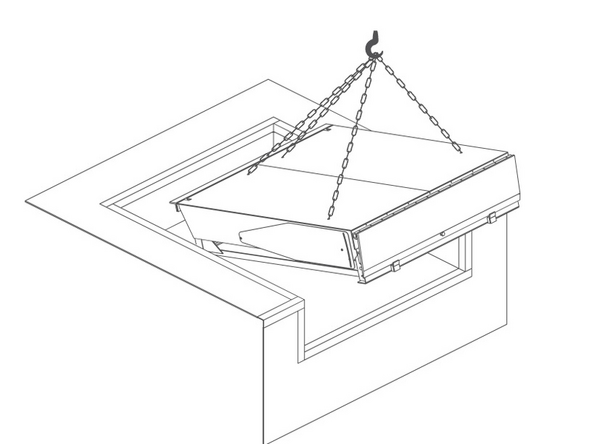
Hoist your leveler with a forklift or crane.
-
-
-
Measure and confirm all pit dimensions before dropping the leveler into the pit.
-
Reference the beginning of this manual for full-size versions of these images.
-
-
-
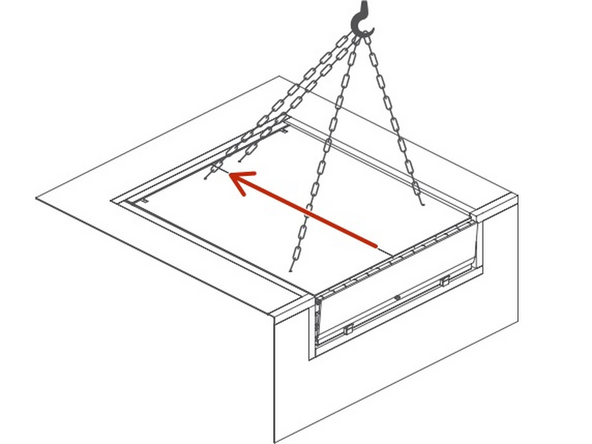
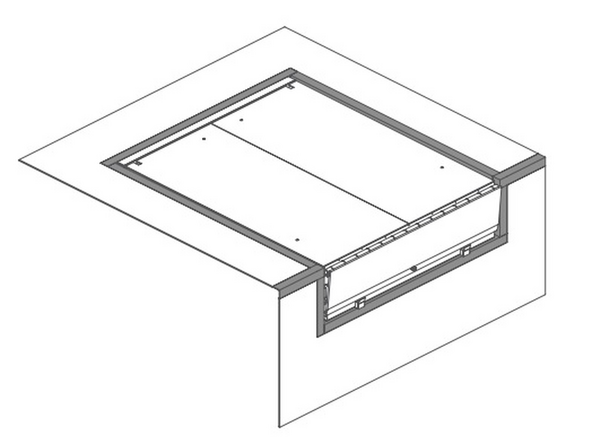
Slowly, and carefully lower your leveler into the pit.
-
-
-
Make sure to leave even spacing on both sides of the leveler.
-
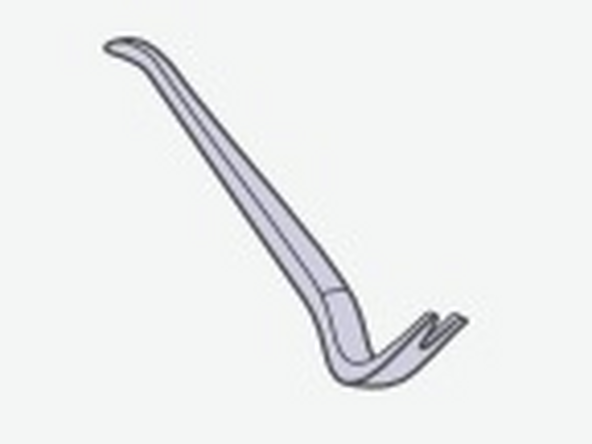
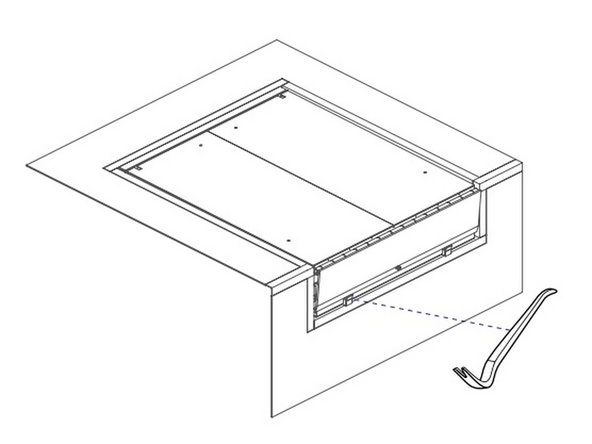
Use a 3-5ft crowbar to move the lift.
-
-
-
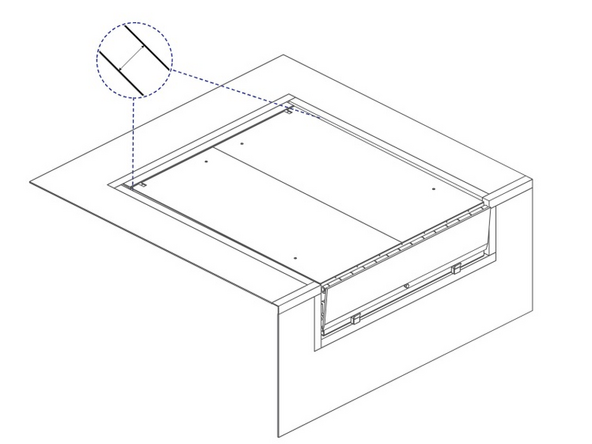
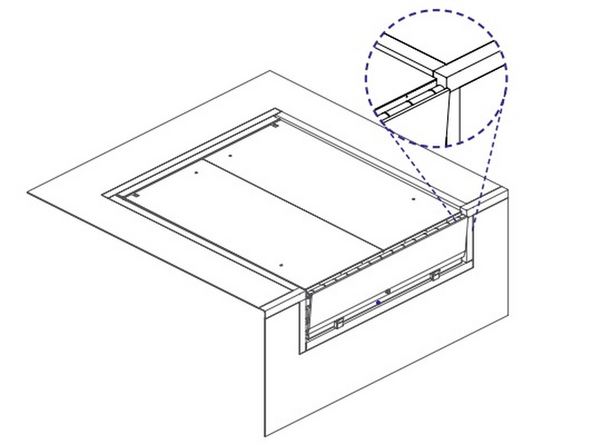
Carefully shift the leveler so that it sits tight up against the steel frame at the back of the pit.
-
-
-
Check if the deck is flush with the pit's frame.
-
-
-
Use the forklift/crane, and/or a crowbar to lift the ramp to the appropriate height (flush with pit's frame).
-
Place shims at the front, rear and center of the ramp base.
-
When shimming the leveler to the proper height (deck sitting flush with the pit's steel frame), shims must be added directly underneath ALL vertical support structures, and wherever force is transferred vertically through the frame.
-
In most cases, this will be between 5 and 7 shim locations.
-
Make sure the leveler is completely level before moving on.
-
-
-
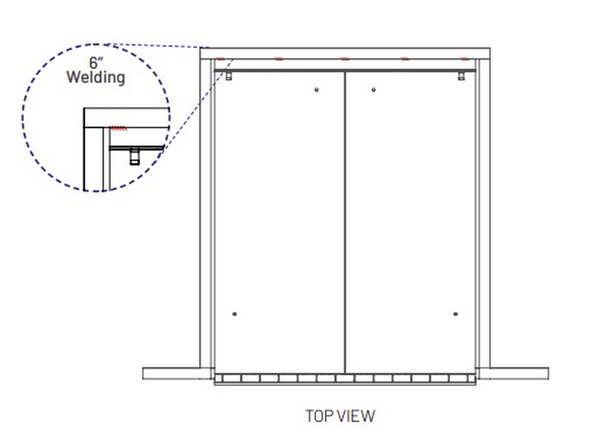
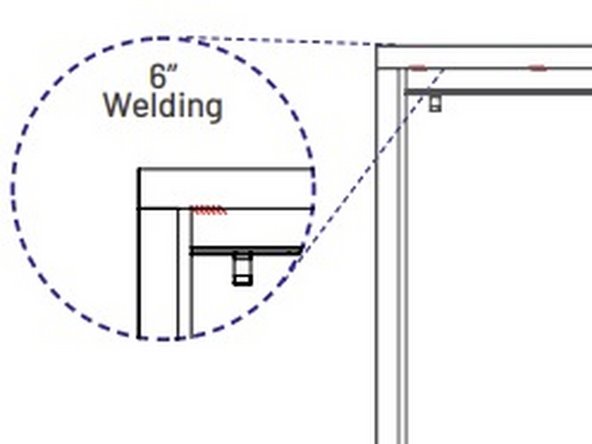
Weld the shims to the leveler's frame.
-
Next, weld the rear transition angle to the rear pit steel at floor level.
-
Use a series of (5) 6" welds across the transition angle.
-
-
-
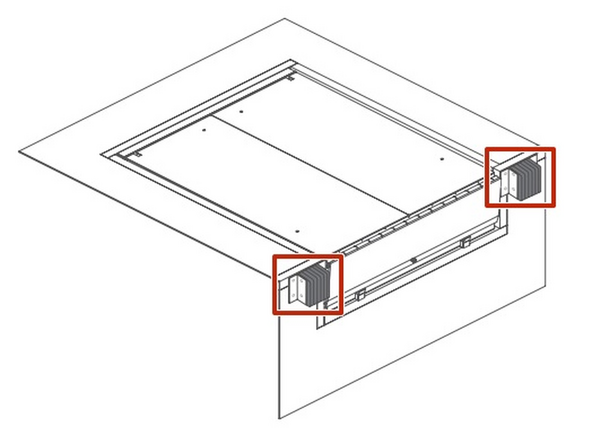
Use a combination of welding and material-appropriate fasteners to secure the dock bumpers onto your building.
-
Always mount the inside edge of bumper mounting plate flush with the edges of the pit.
-
-
-
Retouch the areas where you welded with spray paint.
-
-
-
Your Mechanical dock leveler is ready to use!
-


Attached Documents
Team
