-
-
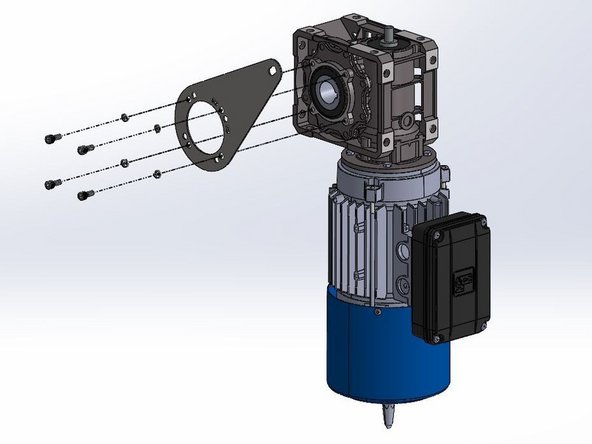
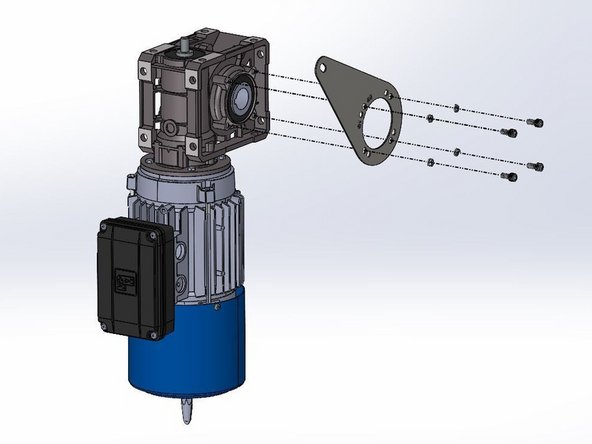
(4) M6 x 10mm Socket Cap Screws
-
Requires 5mm (3/16in) Allen Wrench
-
(4) M6 Split-Lock Washers
-
(1) Motor Mount Anti-Torque Bracket
-
-
-
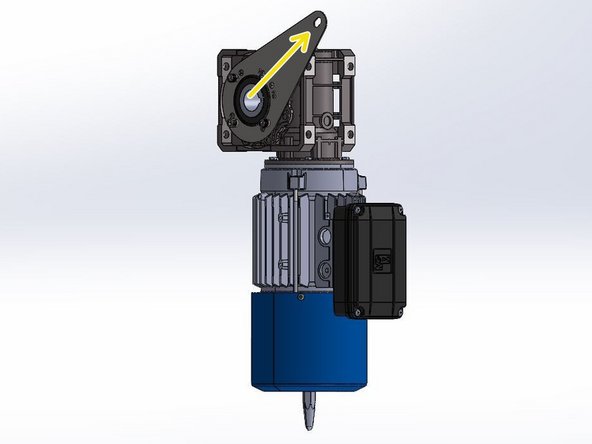
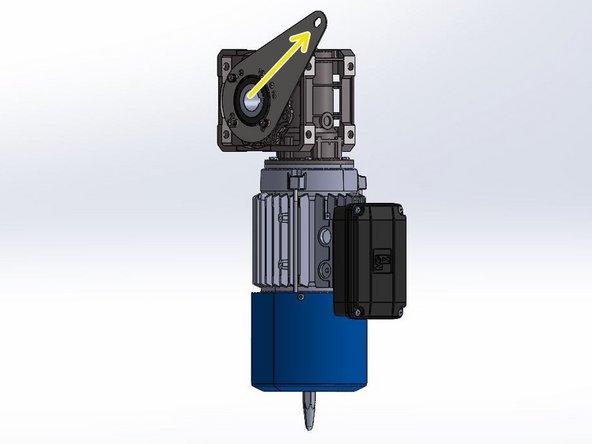
Note the Orientation of the Bracket in Relation to the Motor.
-
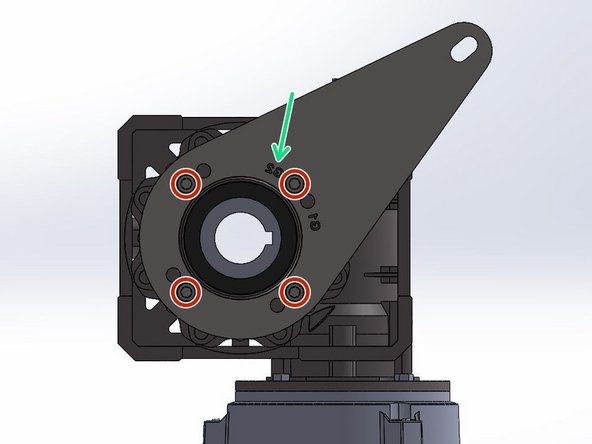
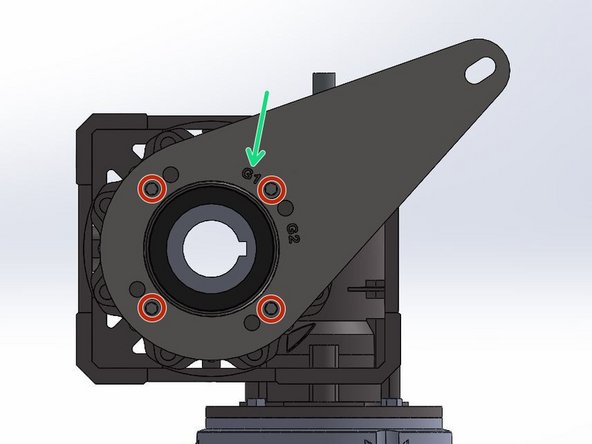
The Bracket has 2 Hole-Patterns Corresponding to G1 and G2 Doors. This ensures the proper Alignment when Installing the Motor Assembly onto a G1 or G2 Door.
-
For a G2 Door, Use the G2 Hole Pattern, and Vice Versa.
-
G1 Doors include Model 2000 and Clean Guard.
-
G2 Doors include Wash Guard, Harsh Guard and Machine Guard.
-
On a LH Drive, G2 Door, the Letters will Read Normally/Forward when the Bracket is Mounted onto the Motor.
-
Place the Bracket up on the Motor with the proper Hole Alignment.
-
Place the Lock Washer onto the Screw and Fasten the Bracket onto the Motor.
-
-
-
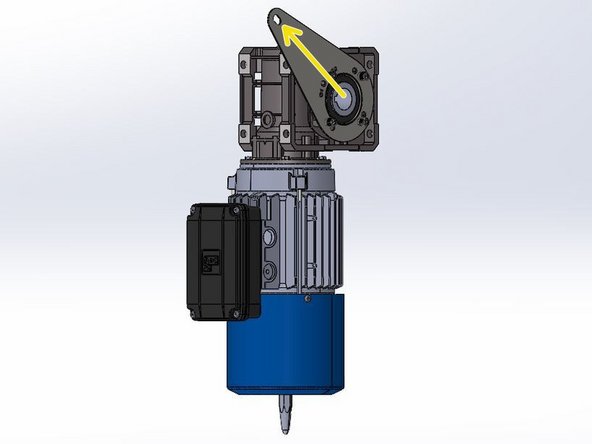
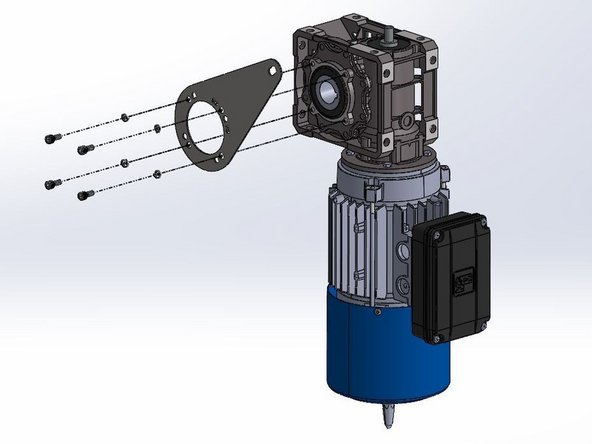
Note the Orientation of the Bracket in Relation to the Motor.
-
The Bracket has 2 Hole-Patterns Corresponding to G1 and G2 Doors. This ensures the proper Alignment when Installing the Motor Assembly onto a G1 or G2 Door.
-
For a G2 Door, Use the G2 Hole Pattern, and Vice Versa.
-
G1 Doors include Model 2000 and Clean Guard.
-
G2 Doors include Wash Guard, Harsh Guard and Machine Guard.
-
On a RH Drive, G2 Door, the Letters will Read Backwards when the Bracket is Mounted onto the Motor.
-
Place the Bracket up on the Motor with the proper Hole Alignment.
-
Place the Lock Washer onto the Screw and Fasten the Bracket onto the Motor.
-
-
-
Note the Orientation of the Bracket in Relation to the Motor.
-
The Bracket has 2 Hole-Patterns Corresponding the G1 and G2 Doors. This ensures the proper Alignment when Installing the Motor Assembly onto a G1 or G2 Door.
-
For a G1 Door, Use the G1 Hole Pattern, and Vice Versa.
-
G1 Doors include Model 2000 and Clean Guard.
-
G2 Doors include Wash Guard, Harsh Guard and Machine Guard.
-
On a LH Drive G1 Door, the Letters will Read Backwards when the Bracket is Mounted onto the Motor.
-
Place the Bracket up on the Motor with the proper Hole Alignment.
-
Place the Lock Washer onto the Screw and Fasten the Bracket onto the Motor.
-
-
-
Note the Orientation of the Bracket in Relation to the Motor.
-
The Bracket has 2 Hole-Patterns Corresponding the G1 and G2 Doors. This ensures the proper Alignment when Installing the Motor Assembly onto a G1 or G2 Door.
-
For a G1 Door, Use the G1 Hole Pattern, and Vice Versa.
-
G1 Doors include Model 2000 and Clean Guard.
-
G2 Doors include Wash Guard, Harsh Guard and Machine Guard.
-
On a RH Drive G1 Door, the Letters will Read Normally/Forward when the Bracket is Mounted onto the Motor.
-
Place the Bracket up on the Motor with the proper Hole Alignment.
-
Place the Lock Washer onto the Screw and Fasten the Bracket onto the Motor.
-
-
-
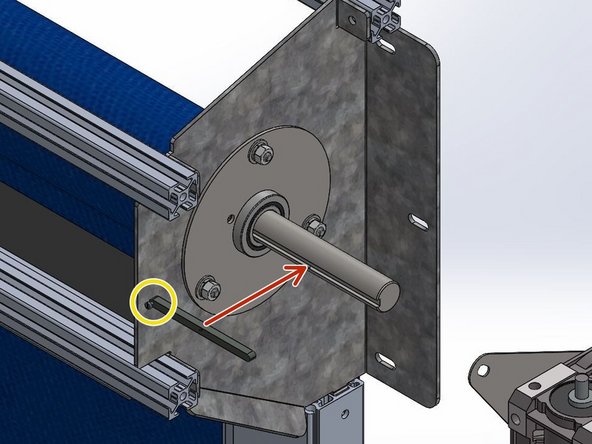
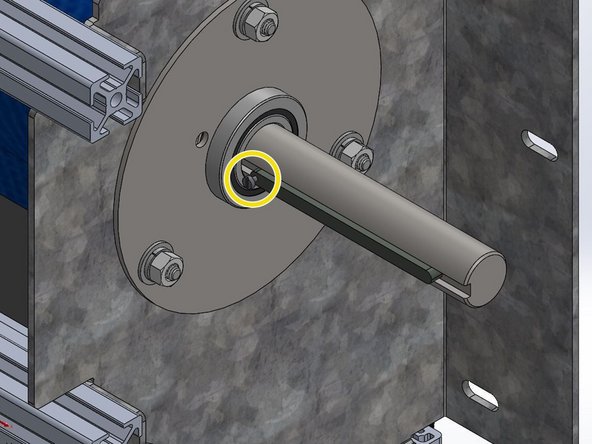
Install the Machine Key onto the Drive Shaft with the Set Screw Oriented Towards the Header (Between Motor and Door).
-
-
-
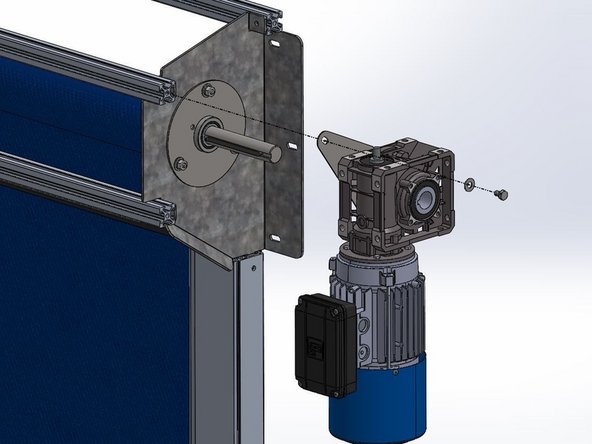
Slide the Motor onto the Shaft and Key.
-
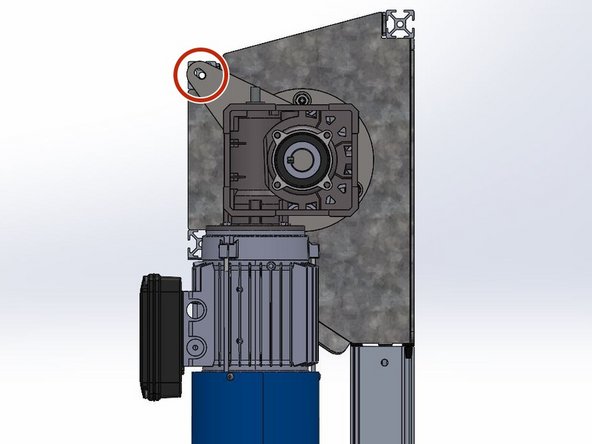
Tilt the Motor to Align the Hole in the Motor Mount Bracket with the Hole on the end of the Upper, Front Rail.
-
This should result in the Motor being oriented Vertically and Plumb (See Image 2).
-
Place the 5/16 Flat Washer onto the 5/16-18 x 1/2in Hex Bolt and Fasten the Motor to the Door with a Ratchet or Impact Driver.
-
If you were provided with a 1/2in Long Black ABS Spacer, Place it Between the End of the Header Rail and the Motor Bracket to Achieve Proper Spacing.
-
-
-
Notice the Stud threaded into the end of the Drive Shaft.
-
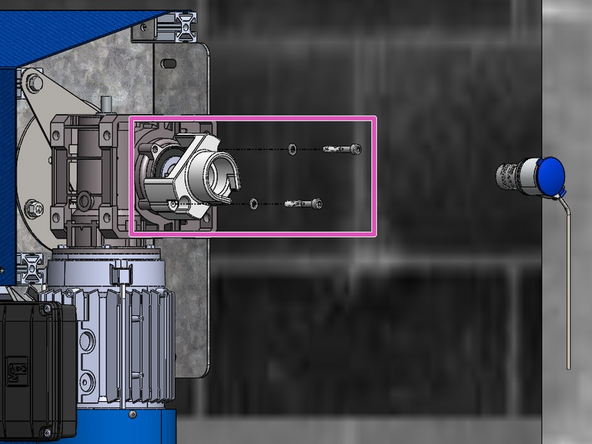
Install the Encoder Mount onto the Motor Housing using the (2) Provided M6 Bolts and Lock Washers.
-
If the Coupler is not already Mounted onto the Encoder Unit, make sure to do that before placing the Encoder inside the Mount. Once inside the Mount, you will not be able to access the Set Screw to secure the Coupler to the Encoder Unit.
-
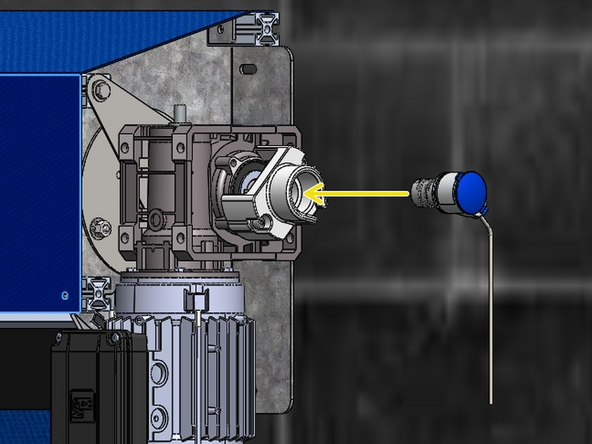
Slide the Encoder Unit + Coupler Assembly into the Mount so that it is fully seated and cannot turn inside the mount.
-
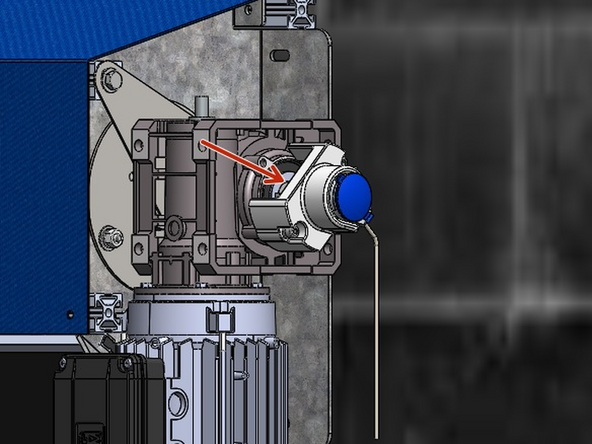
Ensure you also mate the free end of the Coupler onto the Stud on the Drive Shaft.
-
Use the remaining Set Screw on the Coupler to Secure the Encoder Assembly onto the Stud on the Drive Shaft.
-
You may need to manually turn the Coupler to gain access to the Couplers' Set Screw.
-
Almost done!
Finish Line


