
Introduction
Thank you for ordering an L-Shaped Dock Seal from Goff’s Enterprises Inc. Please review this guide and follow the steps and tips to ensure proper installation, maximizing the functionality and longevity of your product.
WARNING!!!
READ THIS MANUAL CAREFULLY. INSTALLATION REQUIRES A LADDER AND TWO PEOPLE AT A MINIMUM, OR BY USING A POWERED LIFT. OBSERVE WARNINGS AND PRACTICE CAUTION WHEN INSTALLING, OPERATING, OR MAINTAINING YOUR METAL HOOD. FAILURE TO DO SO COULD RESULT IN SERIOUS INJURY.
Tools
-
-
Technical Support Contacts:
-
Phone: 262-746-3374
-
Email: techsupport@goffscw.com
-
Website: http://www.goffsenterprises.com
-
-
-
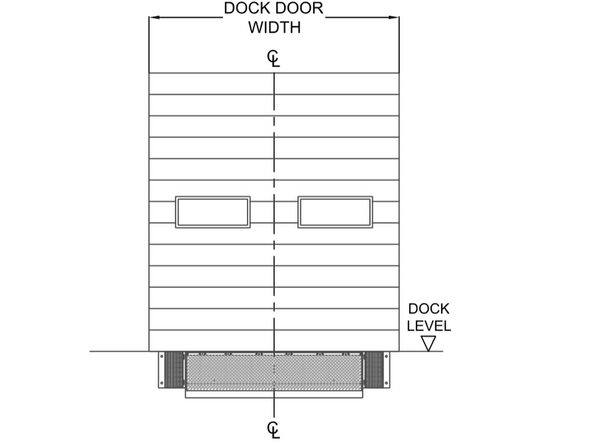
Determine centerline of door opening and mark location on dock floor.
-
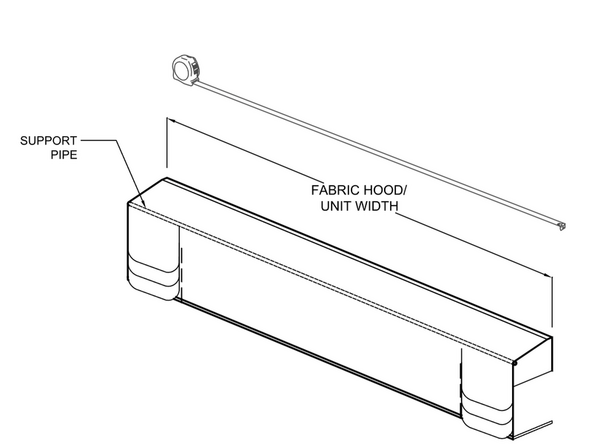
Measure and take note of the Fabric Hood width.
-
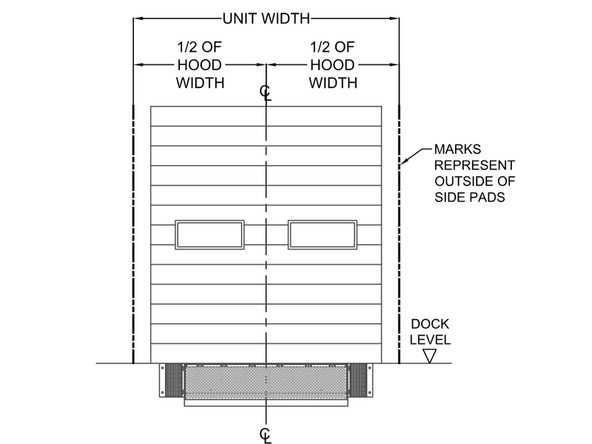
Make marks on both sides of the centerline 1/2 the width of the Fabric Hood to make reference of the location on the outside edge of the Side Pads.
-
-
-
It is important to identify the orientation of the Left and Right Side Pads before installing onto the building.
-
The front of the pads will have (2) strips of Velcro running up the length just on the inside of the left and right faces.
-
The Inside face will have a strip of Velcro to attach the Draft Pad towards the bottom of the Side Pad (RH Pad shown in image).
-
-
-
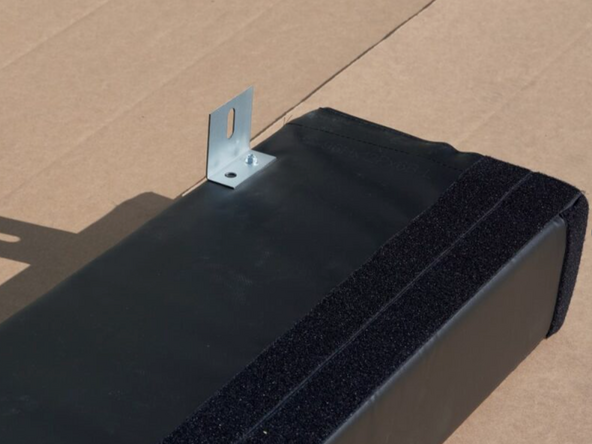
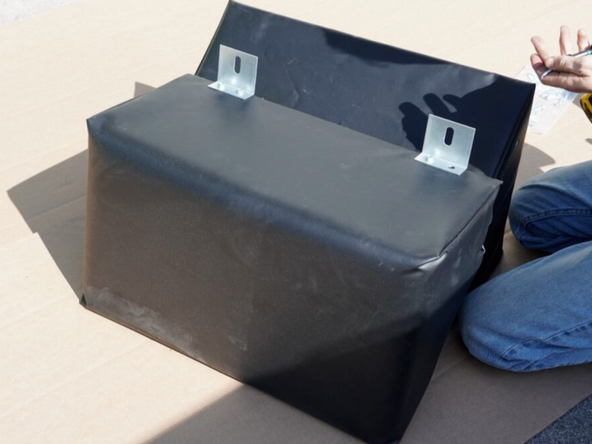
Using the provided Hex Head Screws, attach Angle Brackets on the inside and outside edges of the side pads. There will be one bracket 8"-12" from the top and bottom edges, and one centered as shown.
-
-
-
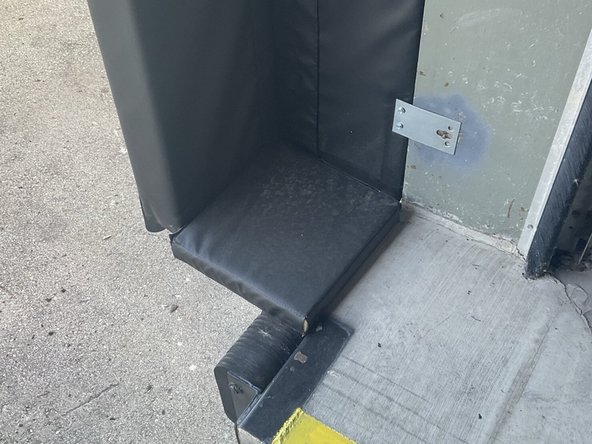
Orient the Side Pad so the bottom face of the Side Pad is flush with the bottom face of the door opening. Use the reference lines drawn in step 1 to make sure the outside edge of the Side Pad plumb with the reference lines.
-
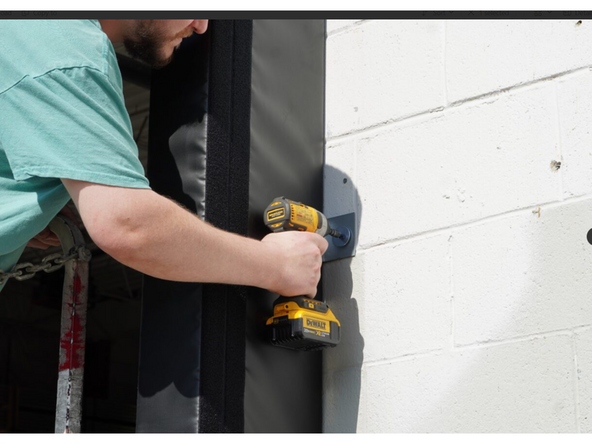
Secure the Side Pad to the building through the mounted angle brackets using anchors, welding, or other best practices based on the building surface.
-
-
-
Using the provided Hex Head Screws, attach Angle Brackets on the inside and outside edge of the side pads. There will be one bracket 4" from the top and bottom edges.
-
-
-
Orient the Filler Pad so the bottom face is resting on top of the Side Pad and so the outside edge is flush with the Side Pad.
-
Secure the Side Pad to the building using anchors, welding, or other best practices based on the building surface.
-
-
-
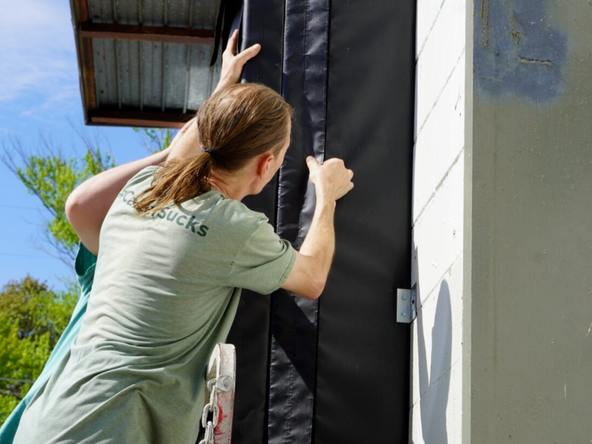
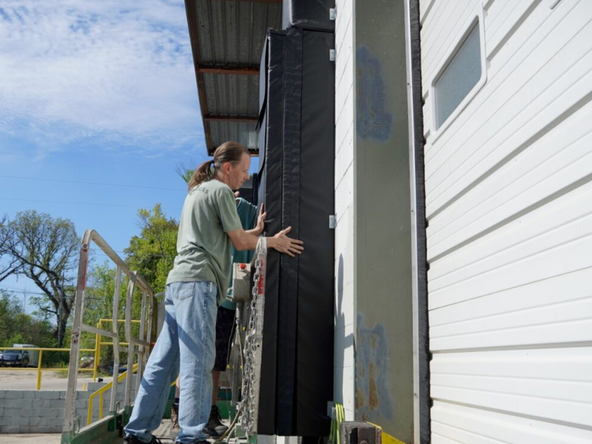
Attach the Left and Right Face Pads by lining up the Velcro Strips towards the front of the Side Pad on the left and right faces with the Velcro Strips on the back of the Face Pads.
-
It helps to start from the top and work your way down, securing the Velcro as you go.
-
-
-
Attach the Draft pads by lining up the Velcro on the Draft Pads with the Velcro on the inside face of the Side Pad and Face Pad.
-
-
-
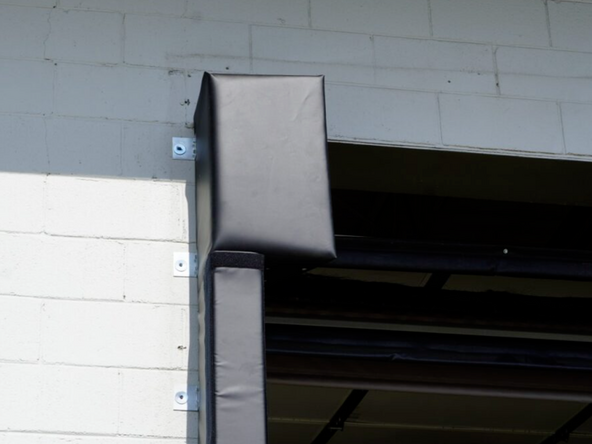
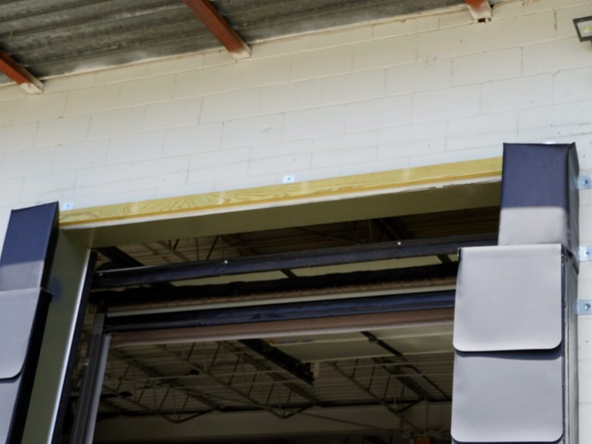
Place the Head Curtain assembly onto the top of the Filler Pads and make sure the edges of the 2x4 are flush with the outside edges of the Side Pads.
-
The 2x4 is fastened to the Head Curtain assembly and is being shown separately in this image to show mounting location.
-
With the edges of the 2x4 flush with the Side Pads, secure the 2x4 to the building using wall anchors 6" from each edge and one centered, or by using other best practices.
-
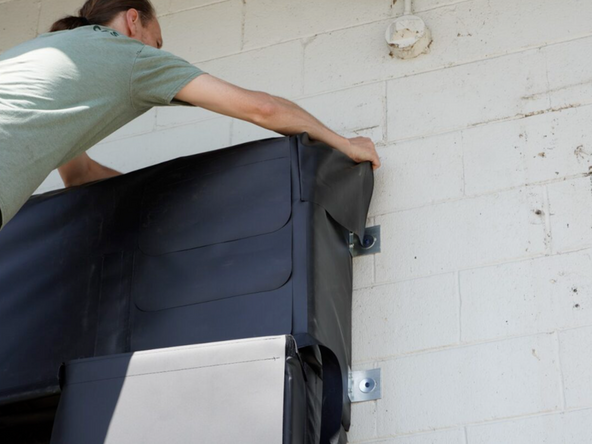
Pull the sides of the Head Curtain around the outside edge of the Side Pads and fasten the lower corner to the backer of the Side Pads on both sides.
-
Stretch and fasten the ends of the elastic bands from the Head Curtain to the backer of the Side Pads on both sides.
-
-
-
Using silicone caulk, apply a generous bead around the seal between the Head Curtain and the building walls to eliminate any gaps.
-


Cancel: I did not complete this guide.
One other person completed this guide.
Team
