Introduction
Thank you for ordering a Dock Seal from Goff’s Enterprises Inc. Please review this guide and follow the steps and tips to ensure proper installation, maximizing the functionality and longevity of your product.
WARNING!!!
READ THIS MANUAL CAREFULLY. INSTALLATION REQUIRES A MECHANICAL LIFT AND TWO PEOPLE AT A MINIMUM. OBSERVE WARNINGS AND PRACTICE CAUTION WHEN INSTALLING, OPERATING, OR MAINTAINING YOUR DOCK SEAL. FAILURE TO DO SO COULD RESULT IN SERIOUS INJURY.
-
-
Measure Head Pad from outside edge to edge and take note.
-
-
-
Measure the door width and divide that number by 2 to determine the centerline of the door opening.
-
Take the Header Pad width dimension from the previous step and divide that by 2 to determine the Side Pad offset from the door opening centerline.
-
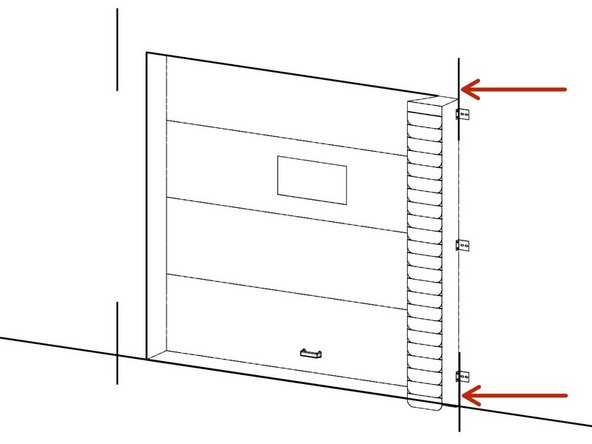
Using the Side Pad offset dimension, mark lines from the centerline of the door opening to each side of the door opening.
-
Make a mark towards the top and bottom of each side of the door opening to help ensure the Side Pads are installed plumb.
-
-
-
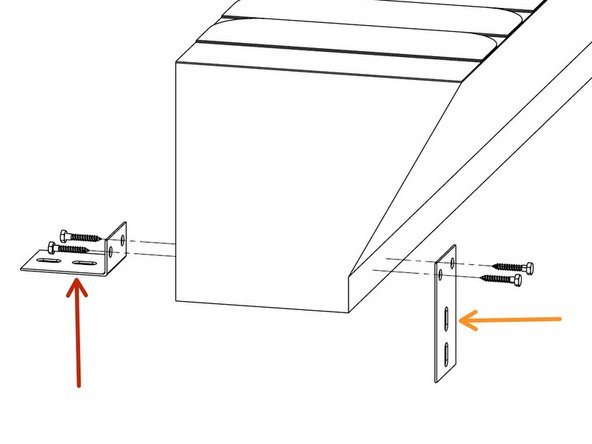
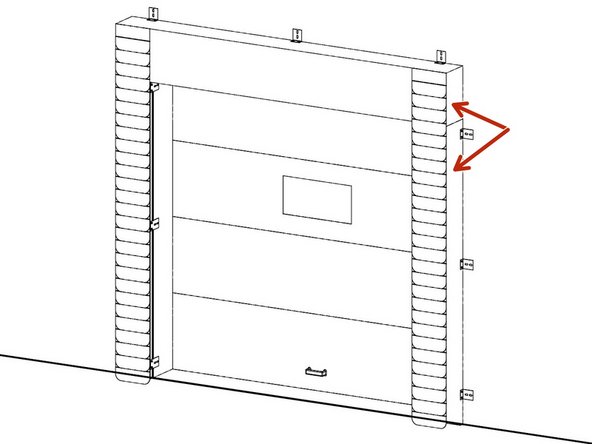
Attach (3) angle brackets to the outside edge using provided lag screws.
-
Attach (3) flat brackets to the inside edges for flush mount applications, otherwise use (3) more angle brackets for offset mounting.
-
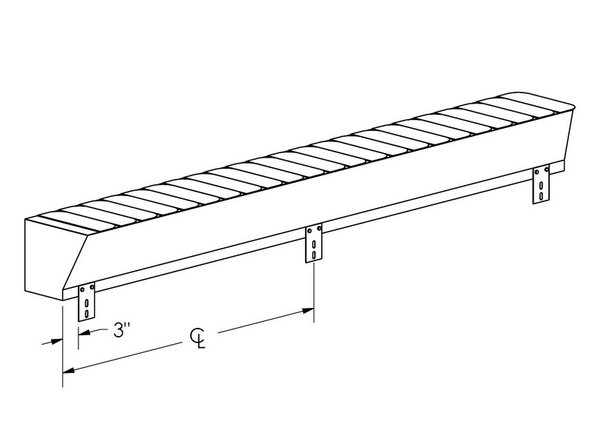
Attach the upper and lower brackets 3" from the top and bottom edges, and attach one centered along the length of the pad.
-
Flush mount application on a 9'Wx10'H door shown in these images.
-
-
-
Rest the bottom of one Side Pad on the ledge of the door opening, while lining up the outside edge of the Side Pad with the vertical lines from Step 2.
-
Secure the Side Pad to the building using anchors, welding, or other best practices based on the building surface.
-
Repeat for the other side.
-
-
-
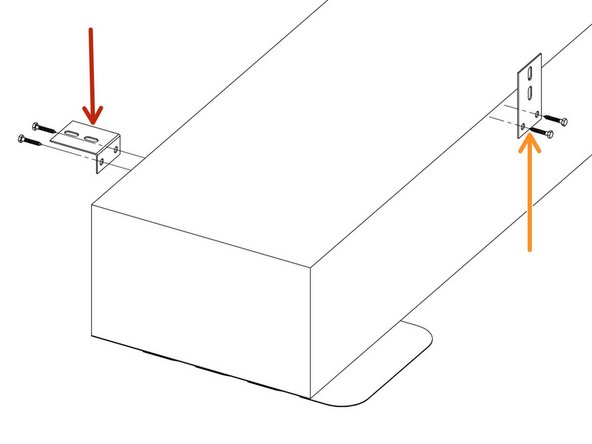
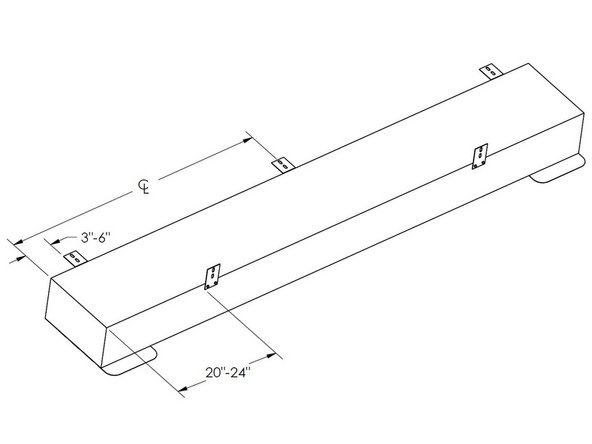
Attach (3) angle brackets to the top edge using provided lag screws.
-
Attach (2) flat brackets to the bottom edge for flush mount applications, otherwise use (2) more angle brackets for offset mounting.
-
Attach the upper brackets 3"-6" from the left and right edges, and attach one centered along the length of the Head Pad.
-
Attach the lower brackets 20"-24" from the side edges of the Head Pad.
-
-
-
Rest the Head Pad onto the Side Pads, and align the sides of the Head Pad with the outside edges of the Side Pads.
-
Once the Head Pad is position fasten the Head Pad into place with the brackets using best practices for mounting hardware.
-
-
-
Using silicone caulk, apply a generous bead around the seal between the Head Pad and the building walls to eliminate any gaps.
-
Cancel: I did not complete this guide.
One other person completed this guide.


