
-
-
The Track Assemblies are marked for orientation as Left side, and Right side.
-
Lay a Track Assembly on a work surface, and un-roll the Side Seal material.
-
-
-
Insert the 1/4" Screw
-
through the Gusset
-
Thread the Nut on the first Screw thread
-
Slide the nut into the shortest side of the extruded Bracket.
-
Flush the Gusset and Bracket, then tighten the pack securely.
-
-
-
Lay the Track Face down. The Track Back has two different widths from the Front face.
-
Insert a 1/4" Screw
-
through a hole from the Inside of the Track.
-
Tracks are Pre Drilled for Projection Brackets at mid-Height and near the Bottom.
-
Thread a Nut on, from the outside of the Track, about one thread.
-
Slide the Long side of the Projection Bracket under the Nut.
-
Hold the Edge of the Bracket about .4" from the Front Edge of the Track, Square the parts up, then tighten the pack snugly. This will be adjusted later to Plumb the Track.
-
Repeat for the other Bracket into the other hole in the Track.
-
-
-
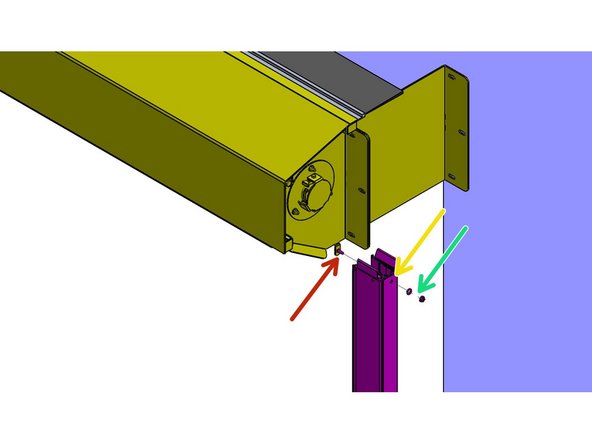
The Track assembly mounts to the outside of the tab of the Header Assembly Mounting Bracket.
-
From the inside of the Header Bracket, Insert the Carriage Bolt fully through the Square hole in the Tab.
-
Install the Track onto the Bolt on the Outside of the Header Bracket Tab
-
Slide the Washer onto the Bolt from the outside of the Track, and snug the Hex Nut on the Bolt. (This Track Mount hardware will be removed in later steps.)
-
-
-
Plumb the Track Left to Right.
-
Transfer the Mounting Hole locations onto the Mounting Surface.
-
Remove the Track, and prepare these locations for Hardware appropriate to the Building Material.
-
Reinstall, snugly, the Track Mount Hardware. (It will be removed again in a later step.)
-
With the track “hanging” in this position, Plumb the Track Left to Right.
-
Secure the Track Brackets to the Mounting Surface.
-
Plumb the Track Front to Back by loosening the Track Bracket Screws.
-
Tighten all of the Hardware Securely.
-
-
-
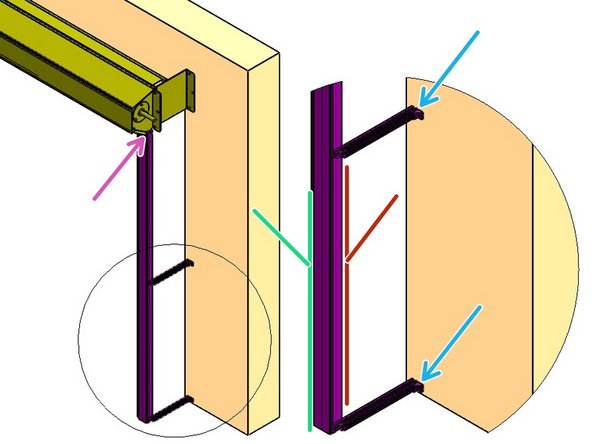
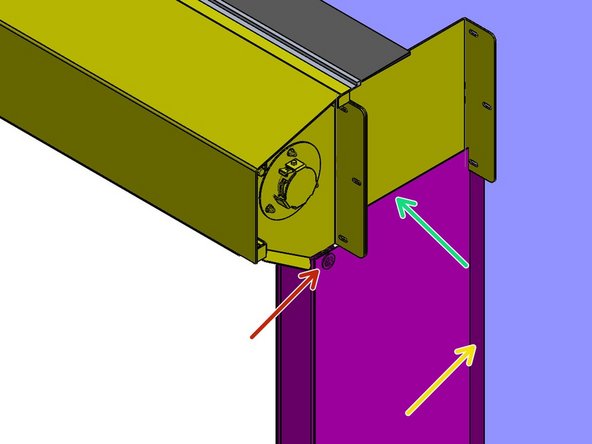
Remove the Track Mounting Hardware.
-
Re-Install the Hardware with the Side Seal Grommet under the Washer and Nut, then tighten Securely.
-
Affix the Hook and loop Material to the Header Bracket along the Top Edge of the Side Seal Material.
-
Fold and Secure the Side Seal Material to the Mounting Surface
-


Team
