
-
-
Attach a Track Mounting Bracket to the Track in the hole located at the bottom.
-
NOTE: For extreme cases, such as “High Wind Loads”, an additional Track Mounting Bracket (supplied) will be necessary.
-
Mark and Drill the Track (.28-.31 dia) at 1.44” in from the front edge (i.e. centered in the groove), at about mid-height of the Track.
-
Once you know where you want the Brackets to be located, it is easiest to Drill from the Inside of the Track to ensure the Hole is Centered in the Groove inside the Track.
-
-
-
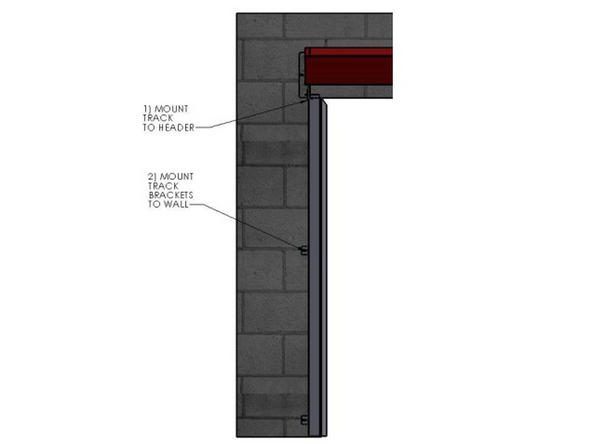
The Track assembly mounts to the outside of the tab of the Header Assembly Mounting Bracket.
-
Insert the Carriage Bolt through the Header Bracket Tab from the inside.
-
Move the Track to the Outside of the Header Bracket, then push the Bolt fully through the Square hole in the Tab and the Track.
-
Slide the Washer onto the Bolt from the outside of the Track.
-
Then snug the Hex Nut on the Bolt.
-
-
-
Plumb each Track.
-
Fasten the Tracks to the Mounting Surface through the Mounting Brackets.
-


Team
