
-
-
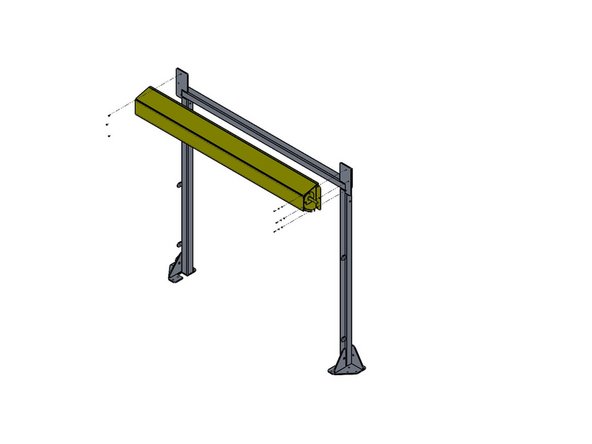
This Instruction begins with the Door Frame already installed. It is shown from the Front side of the Door.
-
When operating, the Door will unroll off the back of the Header Roll, travel through the Tracks, and rest on the floor inside of the notches in the Post Base Plates.
-
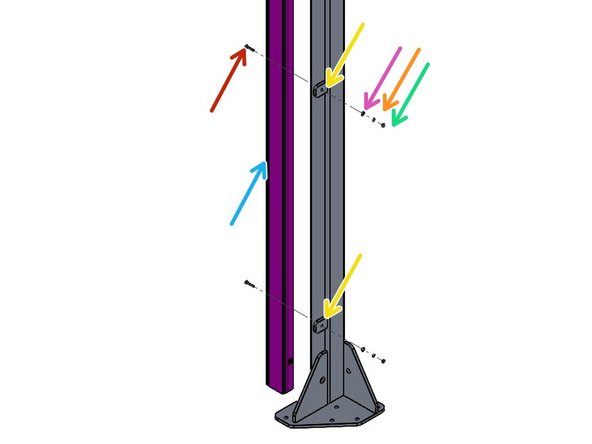
Header Mounting Flanges
-
Track Mounting Flanges
-
Notches in the Post Base Plates
-
-
-
Door Frame
-
Door Header Roll Assembly
-
LH Track
-
RH Track
-
Header mounting - (6) 1" Long Hex Bolt, Lock Washer, Flat Washer
-
Track mounting - (4) 1.5" Long Hex Bolt, Lock Washer, Flat Washer
-
(Optional) Control Box Mounting Bracket
-
-
-
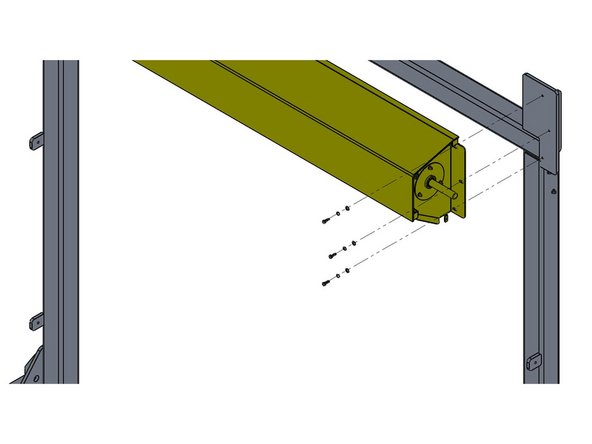
Locate (6) each of 5/16 Dia X 1" long Hex Head Bolts, Lock Washers, Flat Washers = (6) sets.
-
Use two (2) people, and two ladders (at minimum).
-
Raise the Roll Header Assembly into place on the Door Frame.
-
Loosely secure the Header with three (3) sets of mounting hardware per side.
-
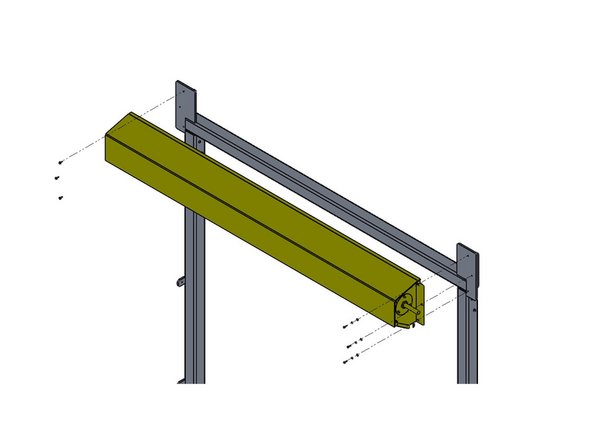
Check the Header Assembly for level.
-
Fully tighten all (6) sets of hardware.
-
At this point, leave the Roll Assembly tied off and held in place as it comes.
-
-
-
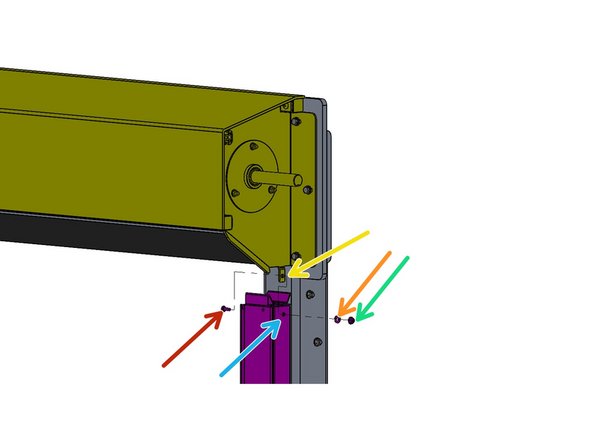
The Track mounts to the Outside of the Tab of the Header Assembly Mounting Bracket.
-
It is important to insert the Carriage Bolt from the Inside of the Header Bracket and the Washer and Hex Nut on the outside of the Track.
-
The Track must be plumb before securing it to the Door Frame.
-
-
-
Move the Track
-
to the Outside of the Header Bracket Tab.
-
Insert the Carriage Bolt through the Square hole in the Tab.
-
Through the Track.
-
Slide the Washer onto the Bolt from the outside of the Track.
-
Then snug the Hex Nut on the Bolt.
-
-
-
At the Bottom End of the Track
-
Insert 5/16" Dia X 1.5" Long Hex Head Bolts through the pre-drilled Holes
-
Push them through the Frame Tabs
-
Insert a Flat Washer
-
Then a Lock Washer
-
Secure the Track and Hardware with a 5/16" Nut.
-
Plumb the Track
-
Fully tighten all of the Hardware Sets.
-
-
-
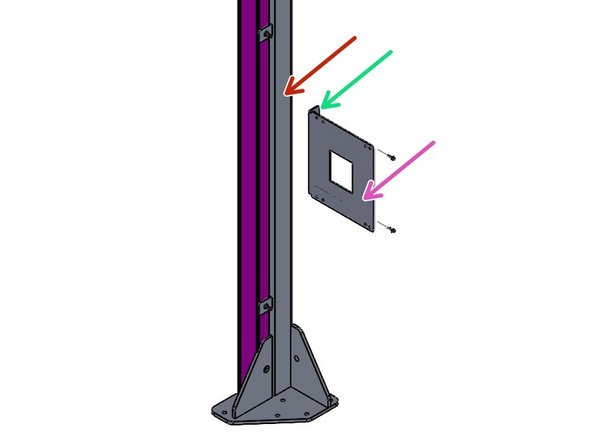
Install the Control Box Mounting Bracket at a convenient location. Somewhere near the Door Opening on the Operator Side of the Door is most common.
-
Orient the Bracket with the small flange mating with-
-
- the Mounting Surface
-
Holes in the Short Flange allow for Fastening. (Hardware not provided)
-
Mount the PLC or RCS Controller to this Bracket.
-


Team
