
-
-
Technical Support Contacts:
-
Phone: 262-746-3374
-
Email: techsupport@goffscw.com
-
Website: http://www.goffsenterprises.com
-
-
-
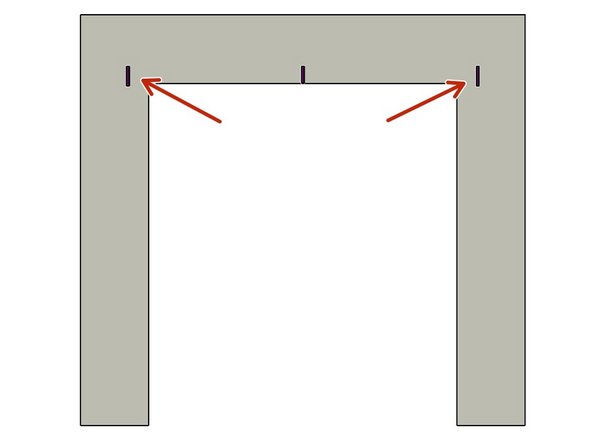
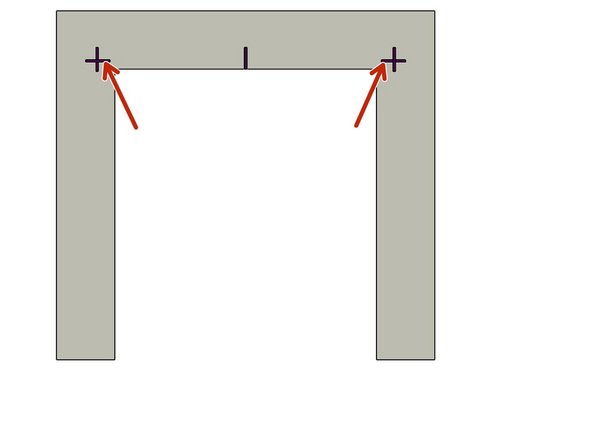
Measure the Opening Width near the top of the Opening.
-
Divide that overall width measurement in half to find the Centerline location.
-
Clearly Mark the Centerline location.
-
-
-
The Header Measuring Process is identical for all Door Models. The Door Model you are installing may be different from the Model shown.
-
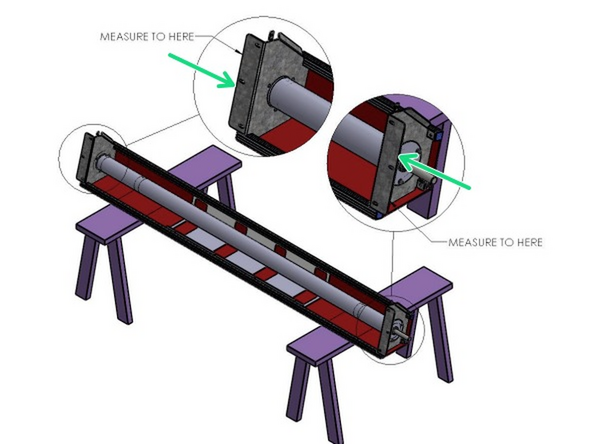
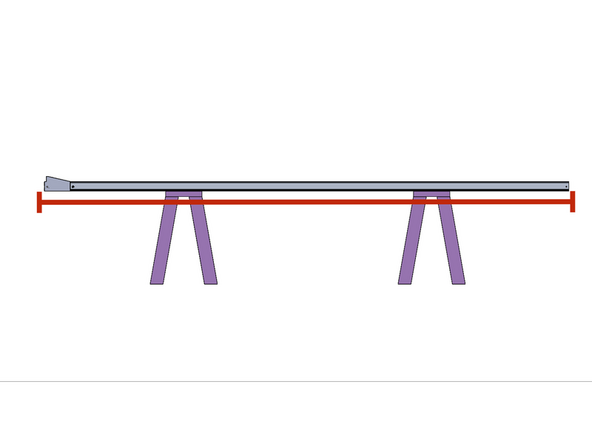
Place the Door roll Header Assembly across a safe and level work surface, and rotate the roll assembly frame so that the Header Bracket Mounting flanges are facing upward.
-
Measure the total width of the whole roll assembly from outermost edge of one Header Bracket’s Mounting flange to the outermost edge of the opposite side.
-
Divide that number by 2. This number is 1/2 of the Header Width, and is used to determine the Header location on the Left and Right Sides of the opening.
-
-
-
Mark this dimension on each side of the Opening Center mark.
-
-
-
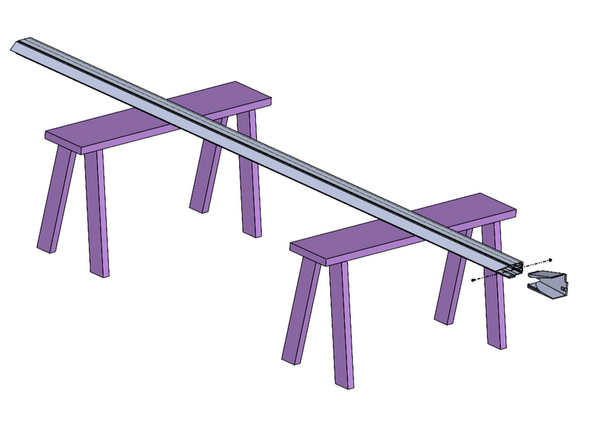
Place the Vertical Tracks across a safe and level work surface.
-
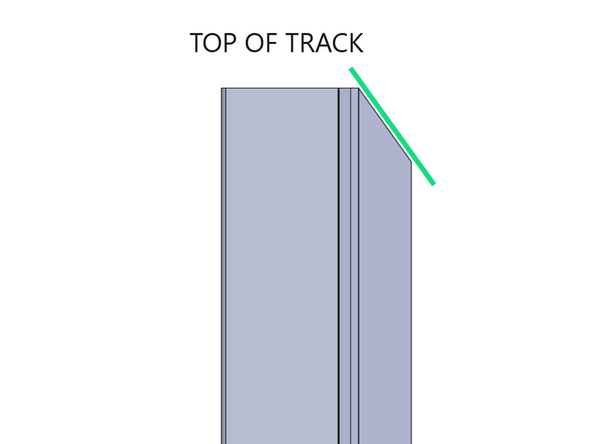
The Top of the Vertical Track has a 45 cut in the track seal.
-
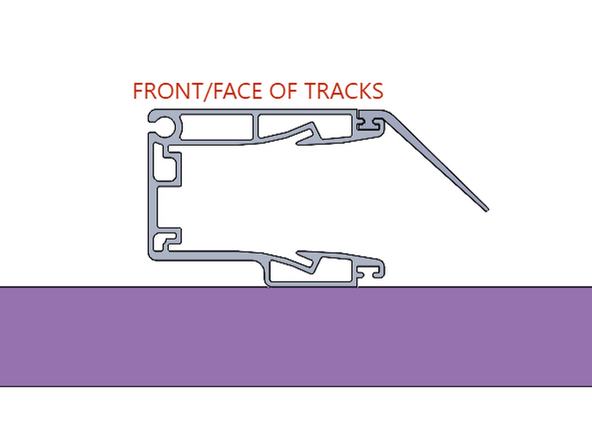
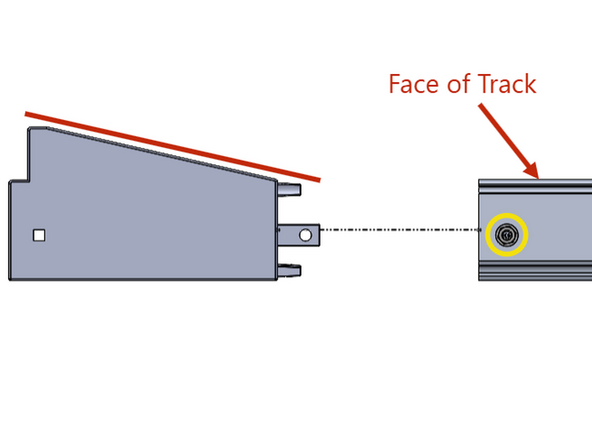
The Front/Face of the Vertical Track is the Widest, Flat Surface.
-
-
-
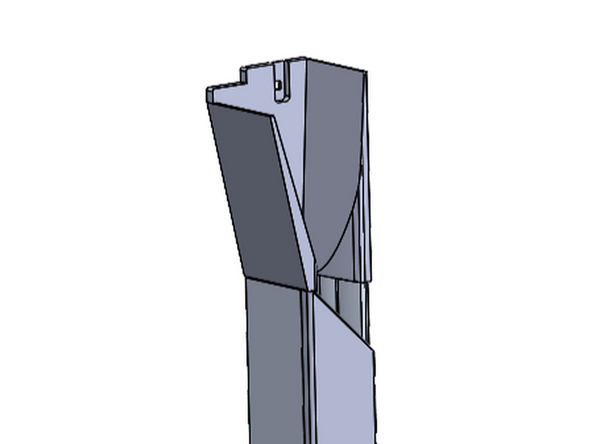
The Ramp Side of the Transition Bracket orients toward the Face of the Track.
-
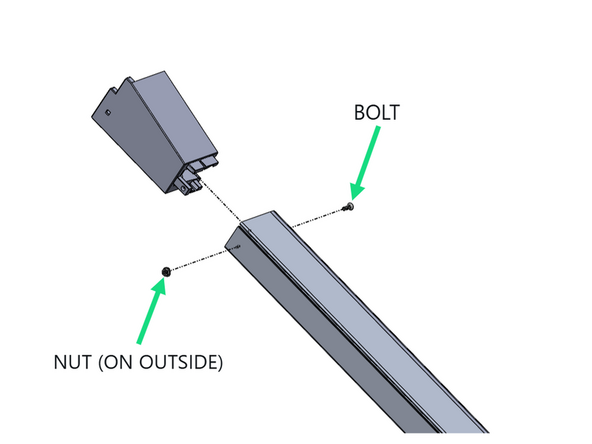
Remove the 1/4-20 Hardware from the Top of the Vertical Track.
-
Fasten the Transition Bracket to the Top of the Vertical Track with the provided 1/4-20 x 3/4in Long Flat Head Bolt, and 1/4-20 Serrated Nut.
-
The Flat Head Bolt is inserted from the inside of the Track.
-
You may need to gently tap the Transition Bracket into the Top of the Vertical Track to get it fully seated. They should interact via a Friction/Interference Fit.
-
Repeat on Remaining Vertical Track.
-
-
-
Measure the Length of the Track Assembly.
-
Add 3/8" (0.375 inches) to this Measurement.
-
This 3/8in Adder is to Accommodate Uneven Floors.
-
This is the Height dimension (from the floor) needed to mark the location of the Bottom edge of the Header Mounting Brackets.
-
-
-
Add a Horizontal line on each side of the Opening that intersects the previously drawn Vertical line.
-
Floor to Horizonal Line = Track Assembly Measurement + 3/8in
-
-
-
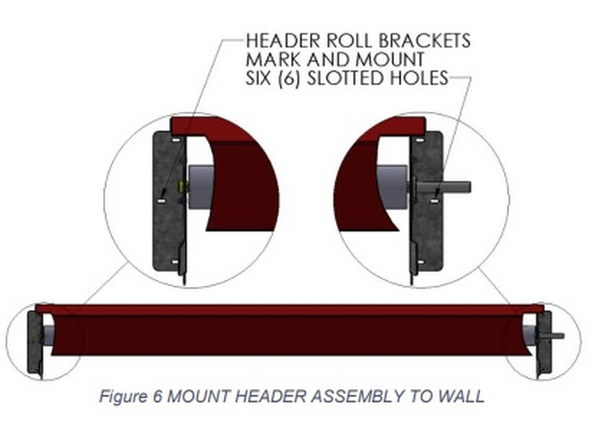
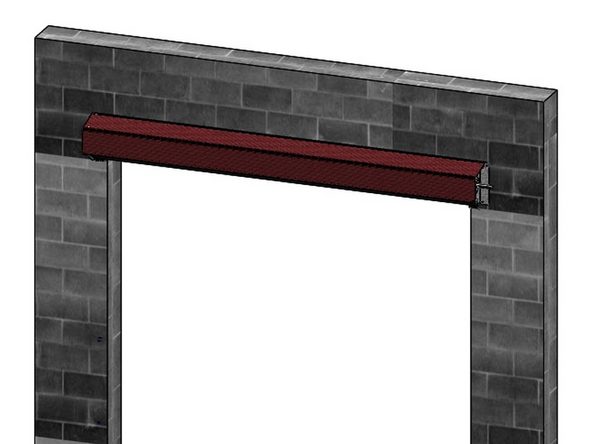
Using two (2) people, and two ladders at minimum, raise the Roll Header Assembly to fit between, and above, your markings on the wall.
-
Trace the insides of the Header Bracket’s three (3) mounting slots onto the wall surface.
-
Be sure that the Mounting Bracket’s bottom edge is on the height line, and that the outer edge is on your vertical/width line.
-
Predrill pilot holes for the mounting hardware at the centers of the traced locations. Using adequate mounting screws or bolts (depending on your building/surface material) to attach the Roll Header Bracket to each side of the opening.
-
Raise the Roll Header Assembly into place on the wall, and loosely secure with three (3) sets of mounting hardware per side using screws or bolts that are adequate to your building/surface material.
-
Check the Header Assembly for level, and fully tighten all six sets of hardware.
-
At this point leave the Roll Assembly tied off and held in place as it comes.
-
-
-
If you would like to mount the optional Track Extensions, please refer to the supplemental Track Extension installation instruction before proceeding. If not, proceed to the next step.
-
-
-
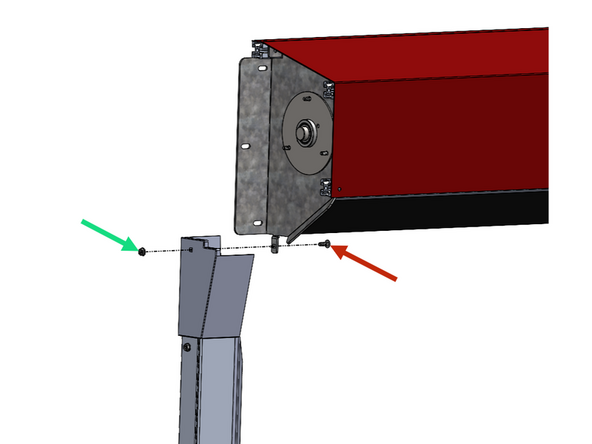
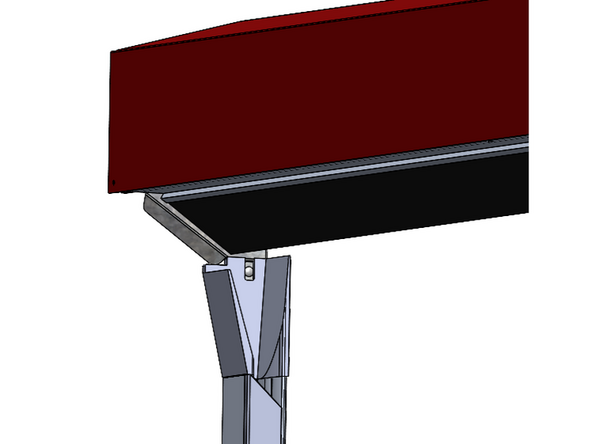
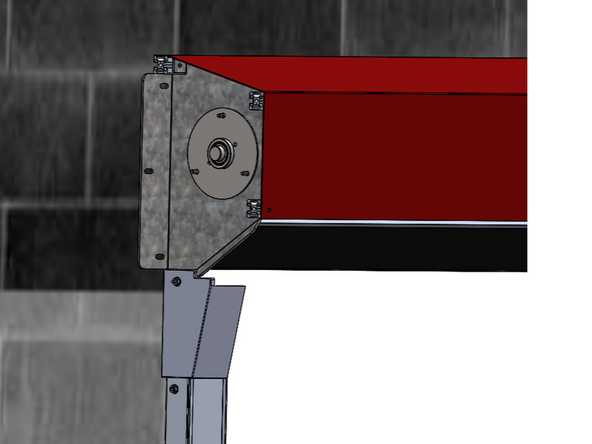
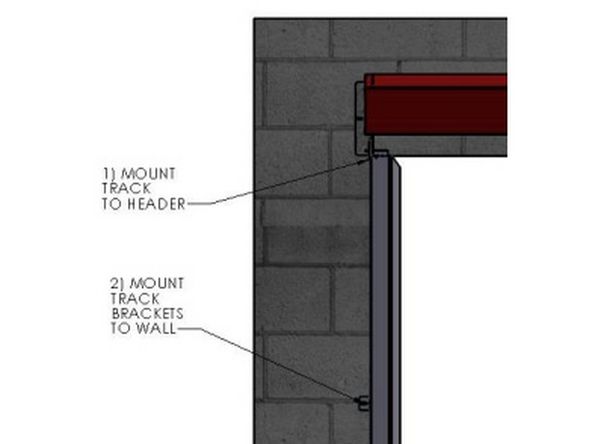
The Track mounts to the Outside of the Tab of the Header Mounting Bracket.
-
It is important to insert the Carriage Bolt from the Inside of the Header Bracket, and to install the Washer and Hex Nut on the Outside of the Track.
-
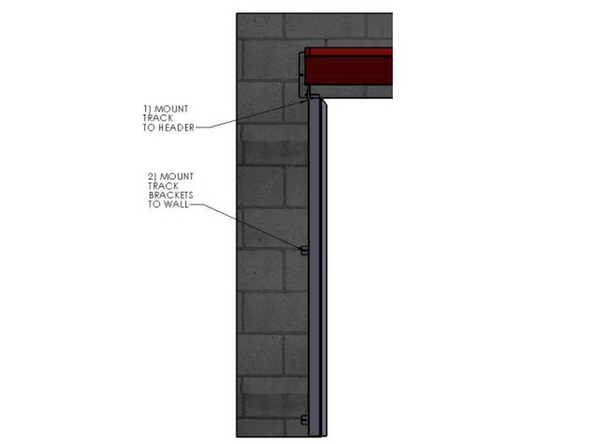
The Track must be plumb before securing it to the Mounting Surface.
-
-
-
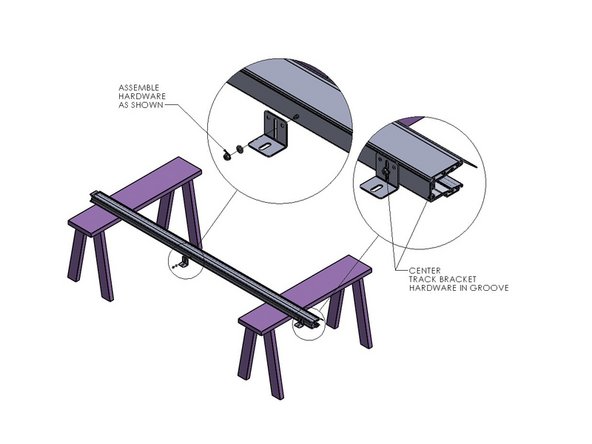
You can mount the provided Jamb Brackets anywhere suitable along the length of the Vertical Tracks. We recommend somewhere near the Bottom and Mid-Point.
-
Each Track will use Two (2) Brackets at Minimum.
-
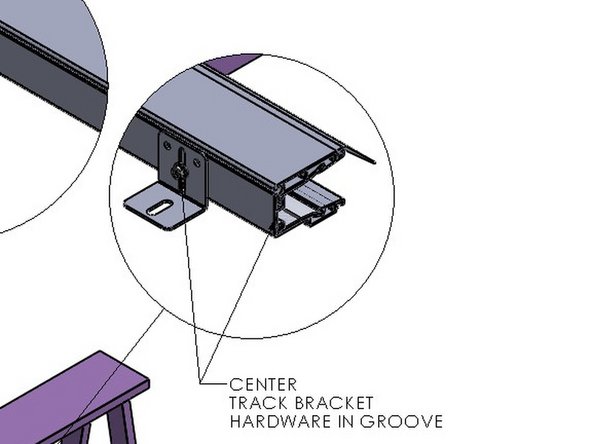
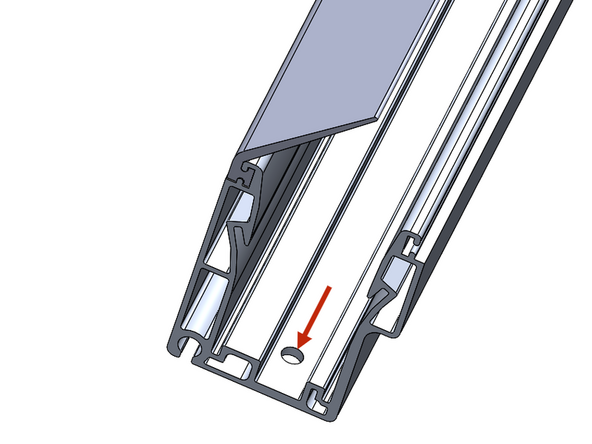
Mark and Drill your holes so that they are centered in the Square Channel inside the Track.
-
Goff's recommends 5/16in Diameter Holes.
-
Insert the 1/4-20 Machine Screws from the Inside of the Track, and install the Serrated Nuts on the Outside of the Track/Track Bracket.
-
-
-
The Track assembly mounts to the outside of the tab of the Header Assembly Mounting Bracket.
-
Insert the Carriage Bolt through the Header Bracket Tab from the inside.
-
Fasten the Serrated Nut onto the Bolt from the outside.
-
Repeat for the remaining Track Assembly.
-
-
-
Plumb each Track.
-
Fasten the Tracks to the Mounting Surface through the Mounting Brackets.
-
Keep the Material and Roll-Tube tie wrapped until the Motor is Powered and ready to have the Limits Set.
-



Team
