
Introduction
Thank you for ordering a Foam Sided Shelter with Metal Hood from Goff’s Enterprises Inc. Please review this guide and follow the steps and tips to ensure proper installation, maximizing the functionality and longevity of your product.
WARNING!!!
READ THIS MANUAL CAREFULLY. INSTALLATION REQUIRES A LADDER AND TWO PEOPLE AT A MINIMUM, OR BY USING A POWERED LIFT. OBSERVE WARNINGS AND PRACTICE CAUTION WHEN INSTALLING, OPERATING, OR MAINTAINING YOUR METAL HOOD. FAILURE TO DO SO COULD RESULT IN SERIOUS INJURY.
Tools
-
-
Technical Support Contacts:
-
Phone: 262-746-3374
-
Email: techsupport@goffscw.com
-
Website: http://www.goffsenterprises.com
-
-
-
Layout Parts and ensure all parts listed above are included.
-
If you purchased your unit pre-assembled, please skip to step 5.
-
-
-
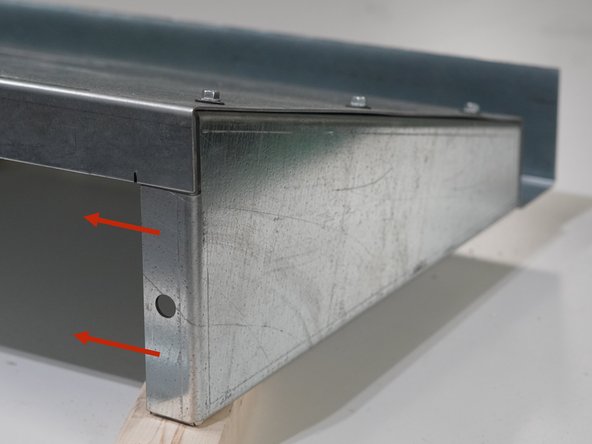
Orient the Roof Panel with the gutter facing up and line up the Left Side Gusset under the left edge of the Roof Panel.
-
Be sure the mounting flange is facing towards the center of the Roof Panel and the top pre-drilled holes are aligned with the Gusset and the Roof Panel.
-
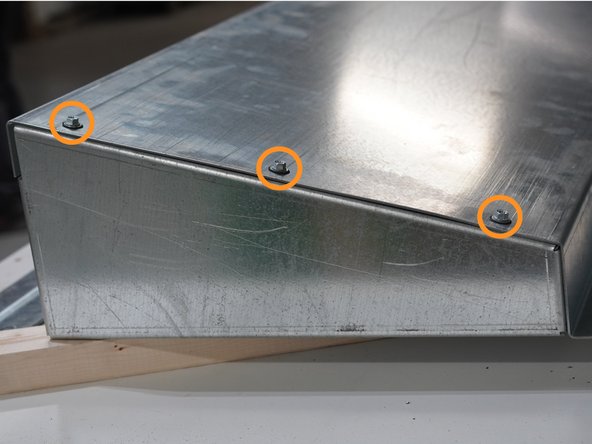
Once the Left Side Gusset is aligned properly, secure it by fastening the (3) provided self-tapping screws through the Roof Panel into the Gusset.
-
Repeat this for the Right Side Gusset.
-
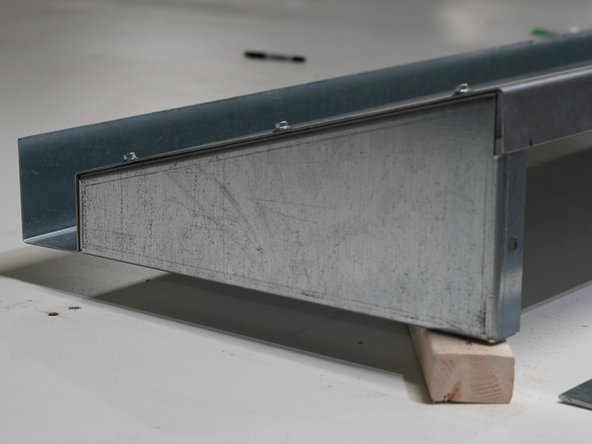
It may help to prop the unit up on 2x4 planks.
-
-
-
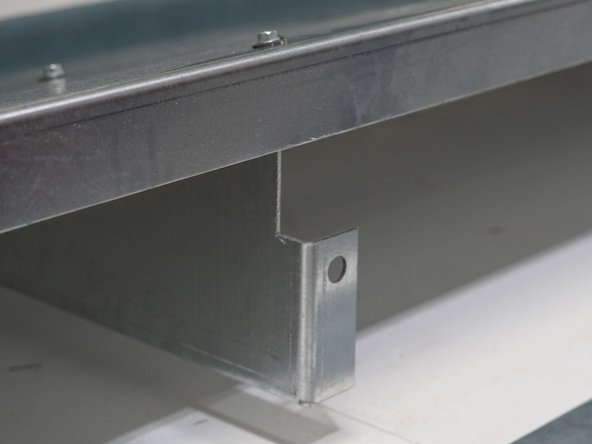
The Center Gussets will have slightly larger notches to make installation of the Roof onto the Mounting Cleat easier.
-
Line up the (2) Center Gussets with the pre-drilled holes in the Roof Panel.
-
Secure the Center Gussets by fastening the (3) provided self-tapping screws through the Roof Panel into the Gusset.
-
-
-
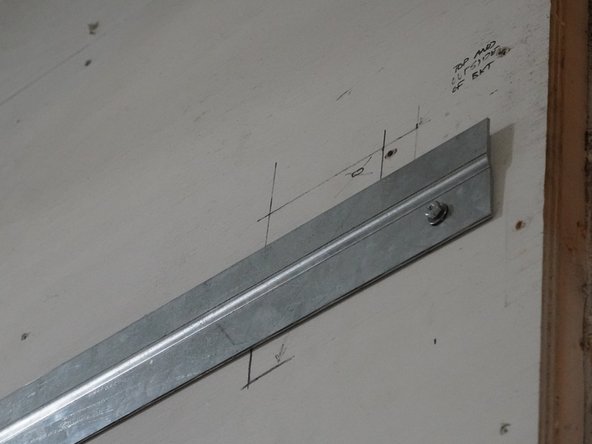
Measure the Roof Mounting Cleat width and the opening width and mark the center lines for reference to ensure The Metal Roof is mounted centered to the opening.
-
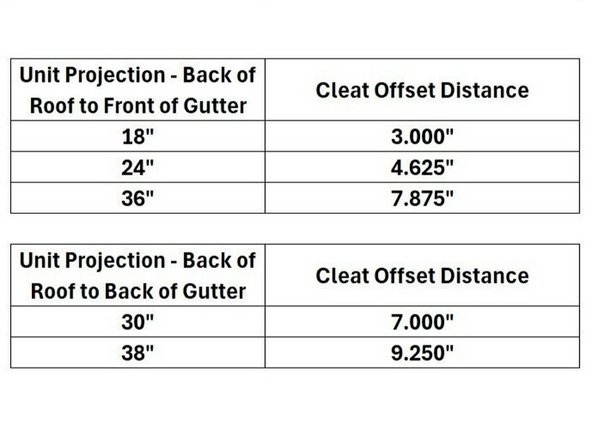
The unit projection determines the height offset distance for the Roof Mounting Cleat.
-
Measure the Unit Projection, and reference the table to determine the height offset from the top of the door opening to the bottom of the Roof Mounting Cleat.
-
Orient the Roof Mounting Cleat centered on the wall with the bend in the Roof Mounting Cleat facing up and away from the wall as shown. Make sure the Roof Mounting Cleat is level and that the bottom edge of the Roof Mounting Cleat is the correct offset dimension above the opening using the Cleat Offset Distance Table.
-
Once you have the Roof Mounting Cleat located properly, using best practices for your surface material, anchor the cleat in place using the (5) pilot holes.
-
-
-
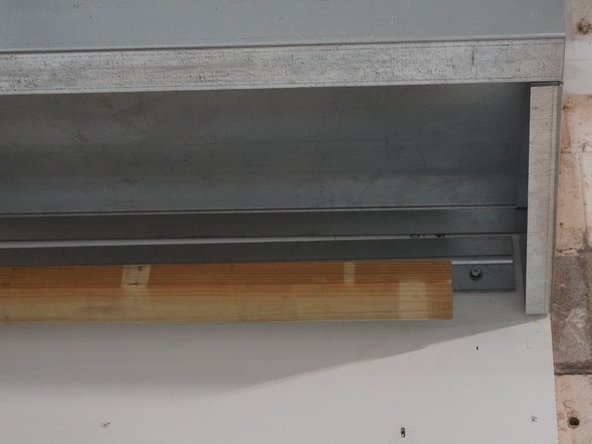
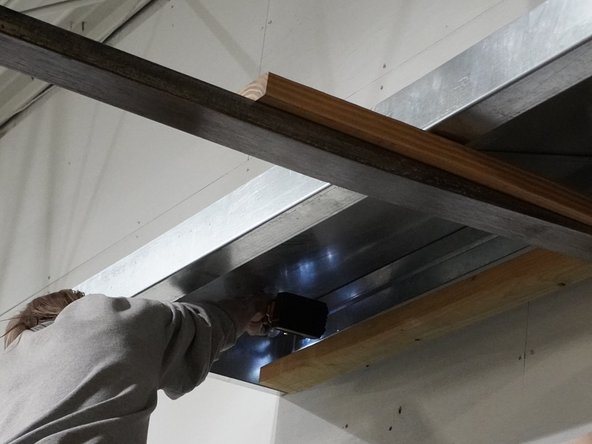
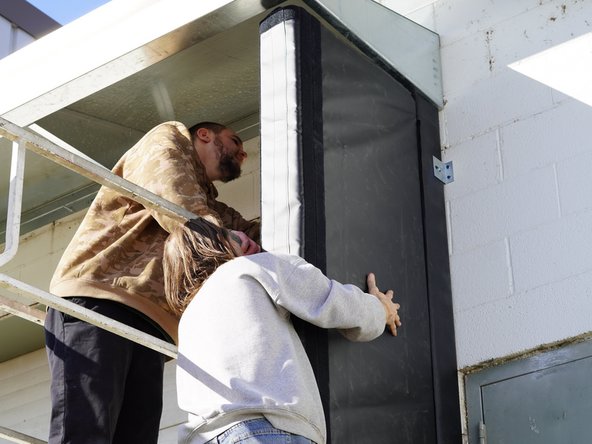
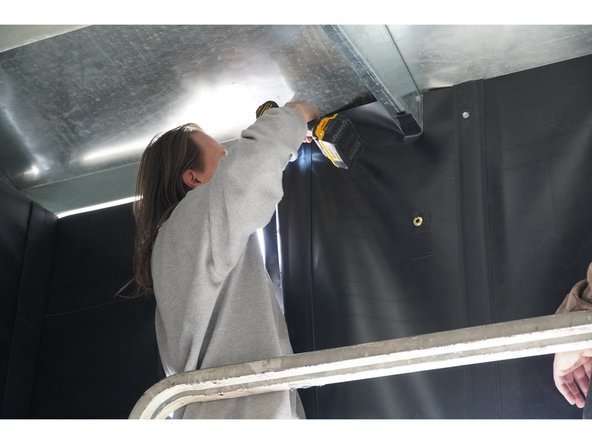
Using a Fork Lift or some other source for lifting the roof up, gently hang the Roof assembly by interlocking the back lip of the Roof onto the Roof Mounting Cleat.
-
Be sure that the back edge of the Roof Assembly is fully seated along the entire span of the Roof Mounting Cleat.
-
There is some wiggle room left to right to adjust and make sure your roof is centered on the opening before fully securing the Roof Assembly to the mounting surface.
-
-
-
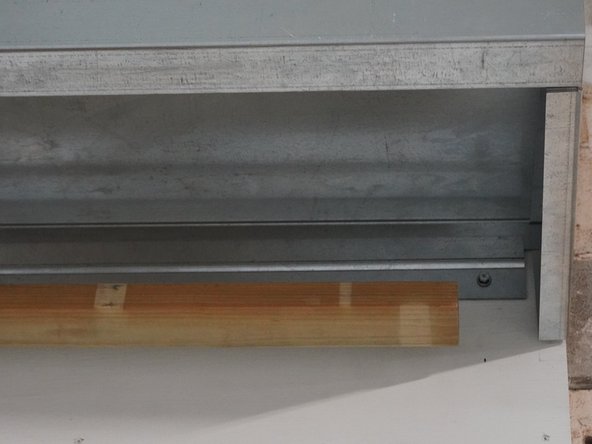
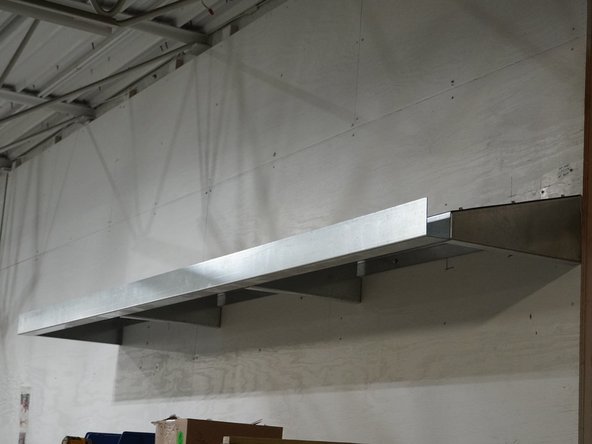
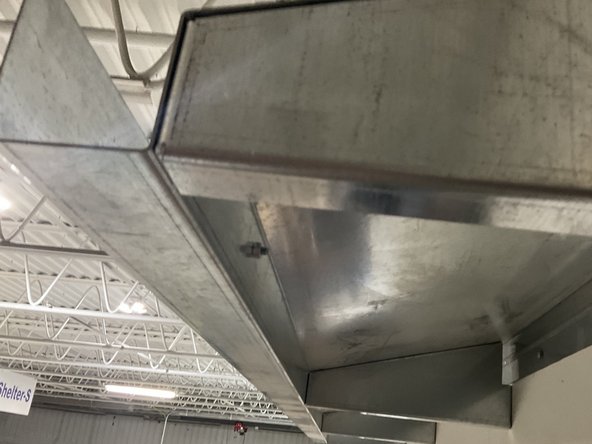
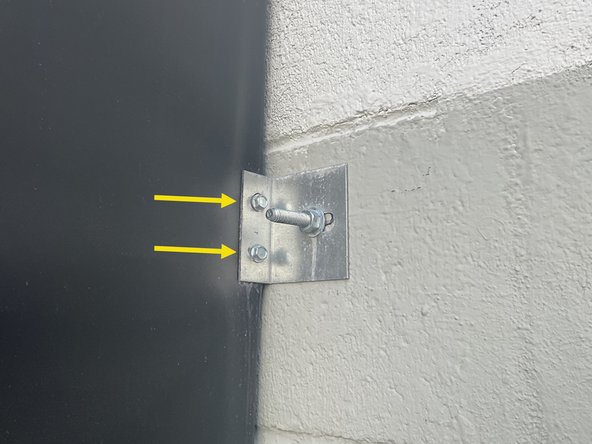
Once the Roof Assembly is in the desired location, using best practices for your surface material, anchor the (4) Gussets into the mounting surface.
-
-
-
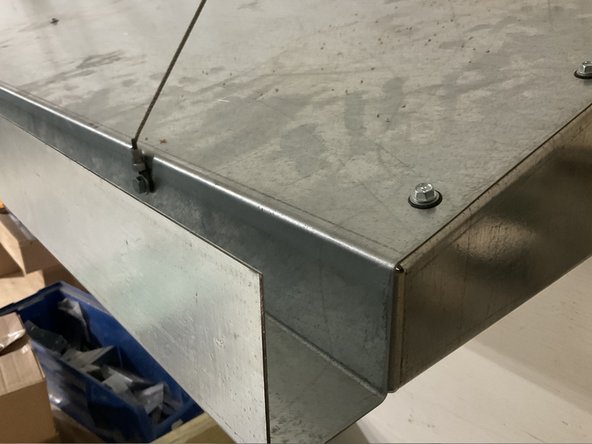
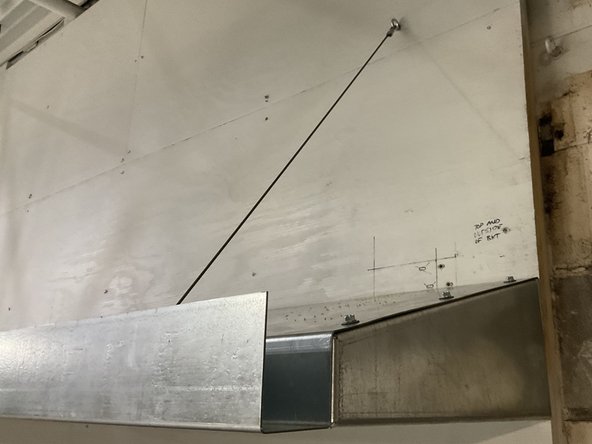
Locate the provided Aircraft Cable Kits.
-
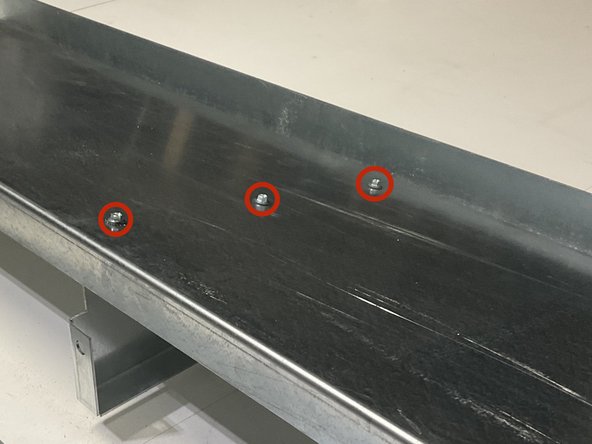
Fasten one end of the Aircraft Cable to the inside of the gutter by taking the Bolt and Washer through the pre-drilled hole on the inside face of the gutter located roughly 12" from each end and attach the nut on the backside.
-
Secure the other side of the aircraft cable using best practices for your surface material to anchor the cable to the mounting surface.
-
Be sure the cables are taut and helping support the Roof Assembly.
-
Repeat for the other side.
-
-
-
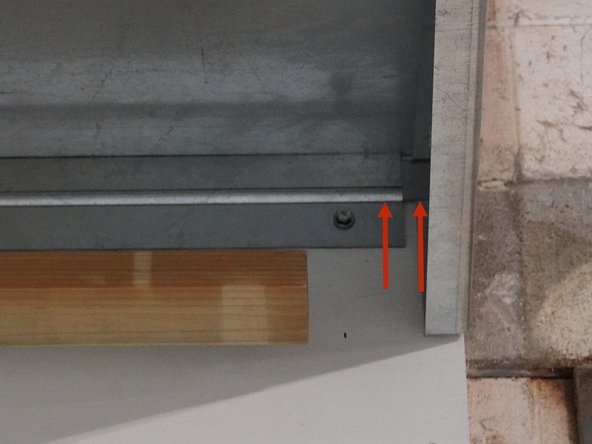
Once The Roof Assembly is installed, be sure to caulk anywhere that you can see daylight.
-
Pay extra attention to the gaps between the back edge of The Roof Assembly and the mounting surface.
-
-
-
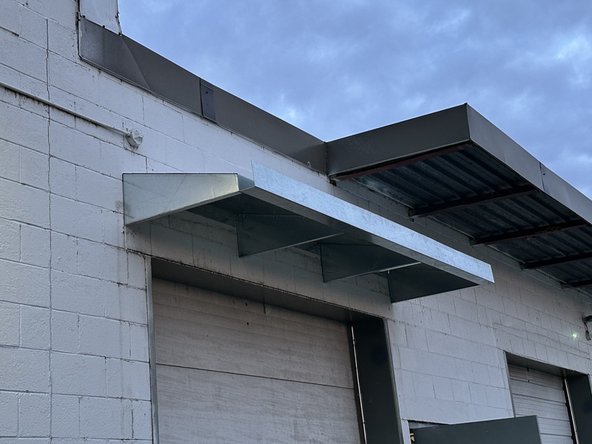
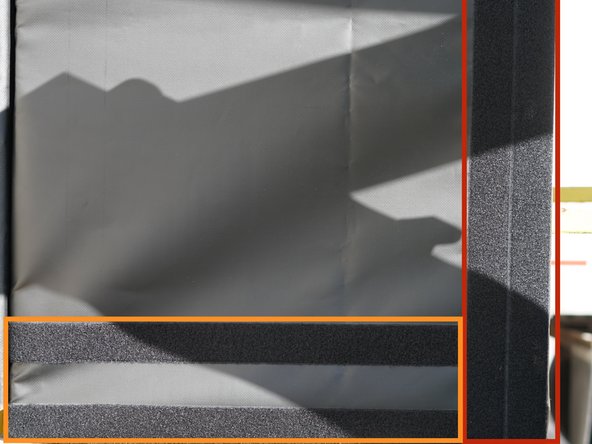
Identify the Left and Right Side Pads
-
The front of the pad will have (2) strips of Velcro running up the length just on the inside of the left and right faces.
-
The Inside face will have (2) strips of Velcro to attach the Draft Pads towards the bottom of the Side Pad (RH Pad shown in image).
-
Once you have the Left and Right Pads identified, line them up so the outside faces are flush with the outside faces of the Metal Roof. Make sure the whole Side Pad is plumb and draw some reference lines.
-
Fasten the Side Pads to the wall using the Angle Brackets on the outside face by fastening (2) of the provided Hex Head Screws into the backer of the Side Pad and using an anchor to attach to the mounting surface. Fasten brackets 12" from the top and bottom of the pad, and one centered in the pad.
-
Fasten 3 more brackets on the inside face of the pad in the same locations as above. You will be provided either Angle, Offset, or Flat brackets for the inside face installation based on the Door Opening Width.
-
-
-
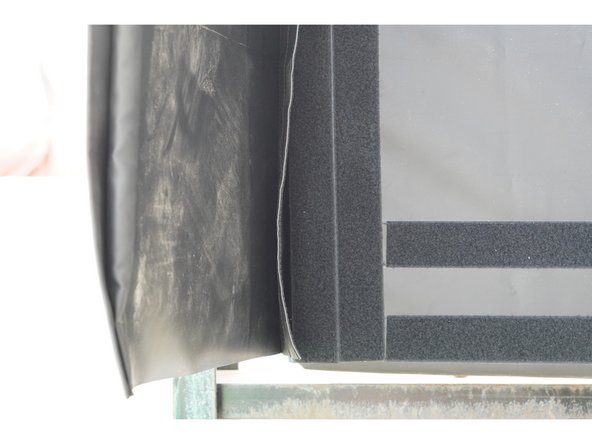
There will be matching Velcro on the top of the Side Pad on the outside face and the outside face of the Metal Roof.
-
Attach the Side Vinyl Patches to eliminate any gaps between the top of the Side Pad and the bottom of the Metal Roof.
-
-
-
Attach the Left and Right Face Curtains by lining up the Velcro Strips towards the front of the Side Pad On the left and right faces with the Velcro Strips on the back of the Side Curtains.
-
-
-
The Top Face Curtain will be installed at the top of the rear face of the gutter by drilling the provided Self-Tapping Screws through the grommets in the top of the Curtain and into the pilot holes on the rear face of the gutter.
-
If the grommets aren't completely lining up with the pilot holes in the gutter it is okay to drill a new one if needed.
-
Start with the center hole and work your way to the ends.
-
-
-
Attach the Bird Mesh by matching the Velcro on the ends of the Bird Mesh Panel, with the Velcro on the top face of the side pads.
-
Be sure to pull the Bird Mesh Panel taut.
-
-
-
Attach bungees from the grommet in the Side Curtain Tabs to the pre-drilled hole on the underside of the center gussets that are 12" from the front of the gussets.
-
Attach bungees from the grommet in the Top Face Curtain Tabs to pre-drilled hole on the underside of the center gussets that are 22" from the front of the gussets.
-
There should be some slack in the bungees. If for some reason the bungees are fully stretched, please drill a new 1/4" pilot hole on the underside of the center gussets closer to the front to allow a little more slack.
-
Crimp the bungees closed on both ends.
-

Team
