-
-
Assemble a Screen to
-
two Posts to create a Screen.
-
Install Feet to each Screen to create Standing Screens.
-
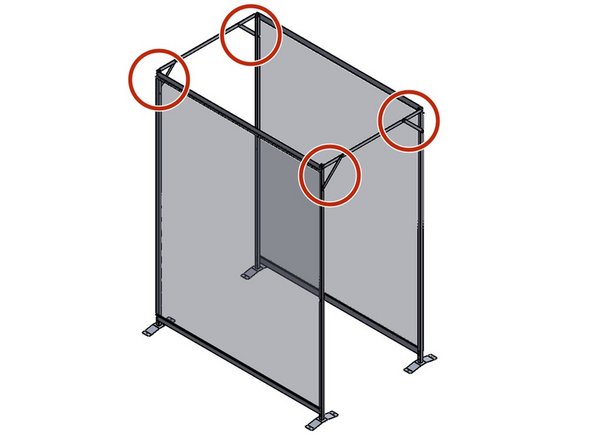
Install Bracing to tie the Standing Screens together.
-
-
-
Lay the Posts on a flat surface.
-
Unroll the Screen between the Posts with the Logo facing Up and at the Bottom.
-
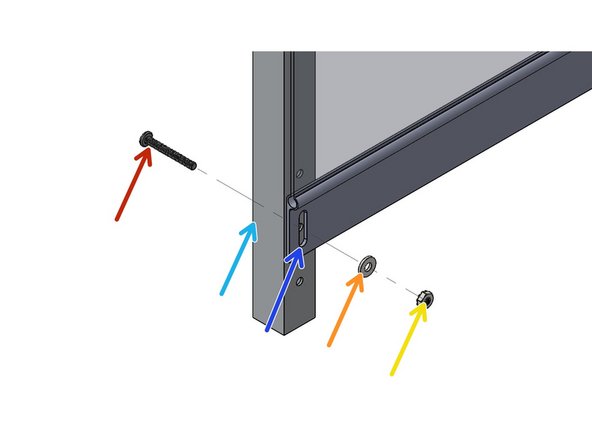
From the Back Side, insert a Screw
-
through the Post
-
through the Screen Slot
-
through a Washer.
-
Secure the pack with a Lock Nut.
-
-
-
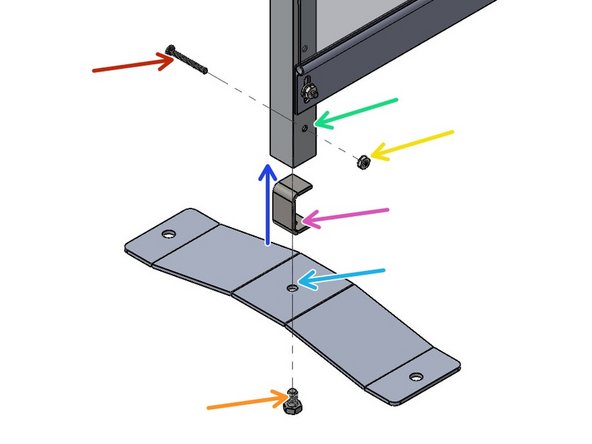
The Post Bottom has 4 holes. The Bottom Hole is used for mounting the Foot, and is not used in this step.
-
At the Post Bottom, slide a Screw
-
through the Post
-
in a Hole that aligns with the Slot Bottom on the Screen.
-
Slide a Washer onto the Screw.
-
Secure the pack with a Lock Nut.
-
Repeat the process for the other Post.
-
-
-
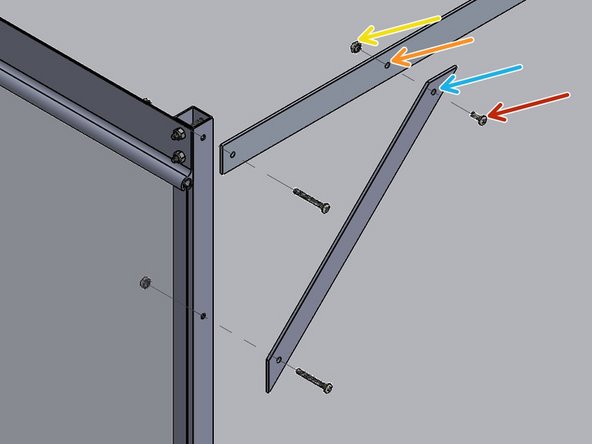
Orient the Foot to the
-
"C" Bracket as shown.
-
Secure the 2 parts together with a Hex Screw creating the "Foot Assembly".
-
Slide the Foot Assembly into the Post Bottom. The "C" Bracket must be oriented as shown.
-
From the Back Side, insert a Screw
-
through the Post's Bottom Hole.
-
Secure the pack with a Lock Nut.
-
Repeat this process for the other Foot.
-
-
-
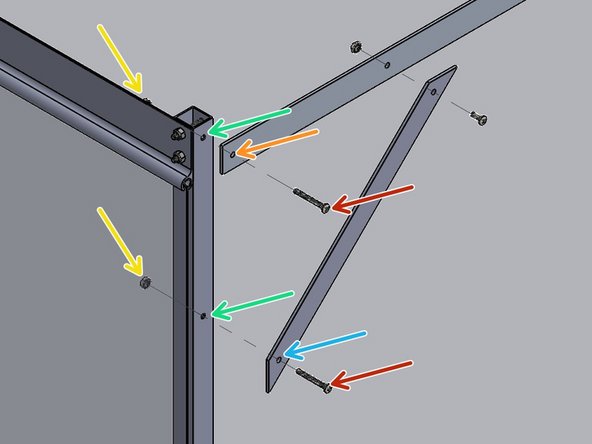
Insert a Short Screw
-
through an Angle Brace Hole. (Orient the Brace as shown.)
-
through the Top Brace 2nd Hole.
-
Loosely Secure the pack with a Lock Nut.
-
Repeat on the other End of the Top Brace.
-
Repeat for the other Top Brace.
-
-
-
Insert a Screw
-
through the Top Brace 1st/End Hole.
-
through the Post Top Hole.
-
Loosely Secure the pack with a Lock Nut.
-
Insert a Screw
-
through the other Angle Brace Hole.
-
through the Post 2nd Hole.
-
Loosely Secure the pack with a Lock Nut.
-
-
-
Repeat the previous step on the other 3 Corners
-
Plumb and Square the Screens.
-
Fully tighten all of the Bracing Hardware.
-
Almost done!
Finish Line


