-
-
The Wall Screen is constructed of 2 Side Rails,
-
It has 4 Spreader Bars (running Horizontally),
-
and has 2 (loose) Brush Holder Fastening Strips.
-
There are 2 (factory Installed) Brush Holder Fastening Strips.
-
The Material is stretched across the the side rails at the Factory and will be Stretched and Fastened across the Top and Bottom Rails of the Frame during this assembly process. Brush Holder Fastening Strips are used to sandwich the Material to the Spreader Bars.
-
-
-
Unpack the DeBug Wall Screen.
-
Unroll the webbing in a large area of open floor space.
-
The material will lay directly on the floor for the Frame Assembly process. The Frame Brackets and Hardware should be facing up.
-
Lay the loose components near the Assembly area.
-
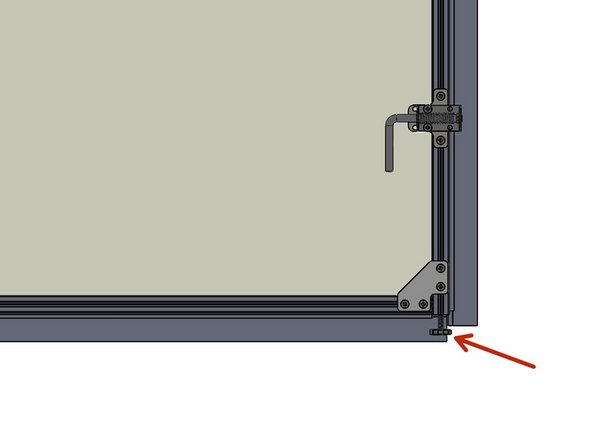
The Side Rails have adjustable Feet which should be oriented to the bottom of the Frame.
-
-
-
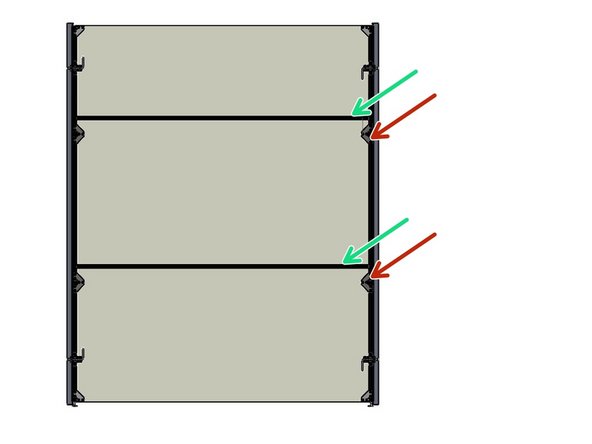
Lay 2 Spreader Bars on the Material near the 2 middle Gussets in the Side Rails.
-
2 Spreader Bars and 2 Brush Holders will be used at the Top and Bottom in later steps.
-
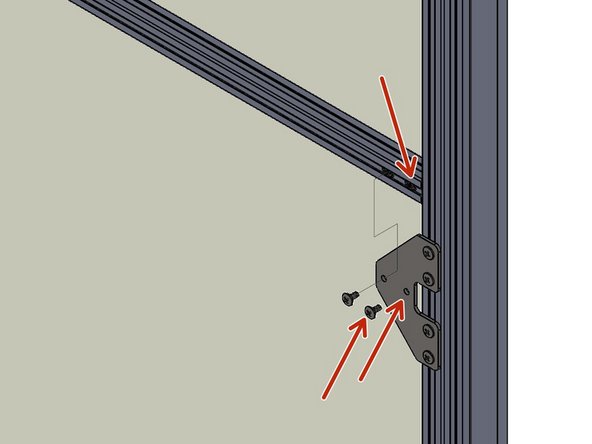
Remove the Screws from 2 Spreader Bars being careful not to move the trapped Nuts.
-
Tap the 2 middle Spreader Bars into place beneath the Gussets.
-
A non-marring Hammer will be necessary to install the Spreader Bars as the materials are sized for a tight fit.
-
-
-
Install the Screws through the Gusset holes and secure them into the trapped Nuts below.
-
Do Not fully tighten the Screws until the Frame is Squared in a later step.
-
The trapped Nuts can be moved along the slots with a small Screw Driver or other small tool.
-
-
-
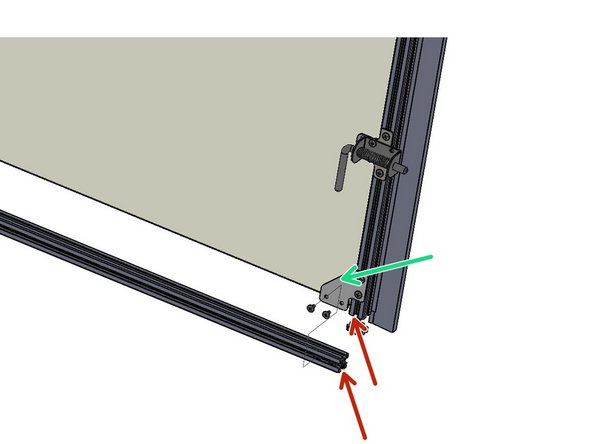
A Spreader Bar and a Brush Holder Fastening Strip will be used at the Top and at the Bottom of the Frame.
-
At the Bottom of the Frame, align the Outer Surface of the Spreader Bar with the Bottom Edge of the Side Post.
-
Fasten the Spreader Bar to the Corner Gusset.
-
Repeat this for the Top Spreader Bar.
-
Square the Frame with Diagonal Measurements.
-
Tighten all of the Hardware fully.
-
Double check that all of the Factory Installed Hardware is fully tightened.
-
-
-
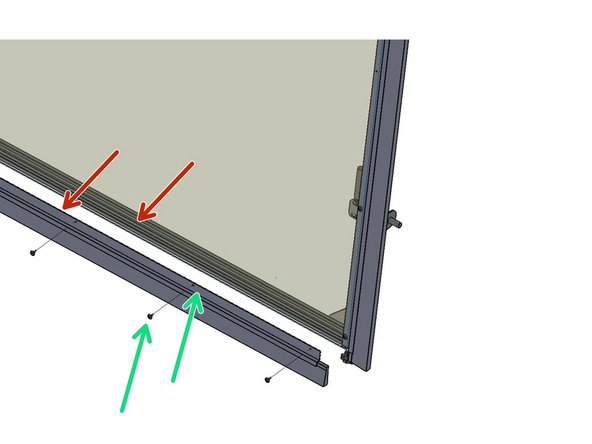
Locate, and use the provided self-tapping Screws for this step.
-
At the Bottom Spreader Bar, align the Upper Edge of the Brush Holder Fastening Strip to the Inner Edge of the Spreader Bar.
-
Pull the material taut
-
Fasten through the pre-drilled Brush Holder Fastening Strip, though the Material, and into the Spreader Bar.
-
Adjust the Brush Left to Right for best fit, then Crimp/deform the Brush Holder Fastening Strip in several Places to secure the Brush in place.
-
Repeat for the Top Brush Holder Fastening Strip.
-
-
-
Turn the Frame Assembly over to expose the Material Side.
-
Trim the excess Material from the Top and Bottom.
-
-
-
Stand the Frame up, then push the Bottom edge into the Opening (at least 3") to suit your needs.
-
Push the Middle and Top of the Frame into the Opening.
-
Plumb the unit in the Opening - Front to Rear.
-
Snug the Frame in the Opening by adjusting the Feet at the Bottom of the Frame Side Rails.
-
-
-
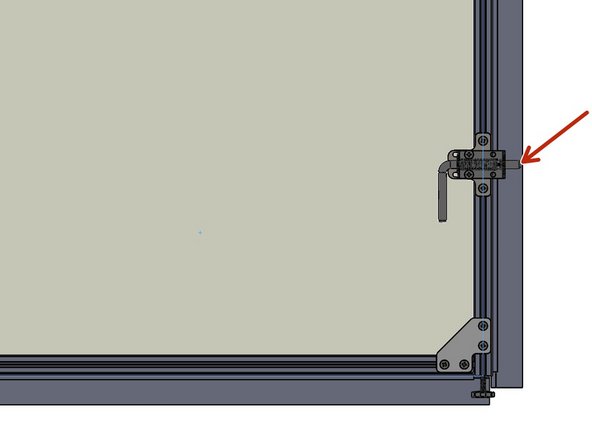
Slide the Bolt Latches to contact the Walls of the Opening.
-
Bolt Locks can be adjusted Top to Bottom by loosening the Bolt Mounting Bracket Hardware in the Frame Side Rail.
-
Bolt Locks can be adjusted Left and Right by loosening the Hardware in the Bolt Mounting Bracket.
-
Transfer the Bolt locations onto the Walls.
-
Move the Frame aside.
-
Drill the Walls to accept the Lock Bolts. (The Bolt Latch Diameter is 1/2")
-
Move the Frame back into its installation location.
-
Slide the Latch Bolts fully into the walls.
-
Almost done!
Finish Line


